Build Log: Bookshelf
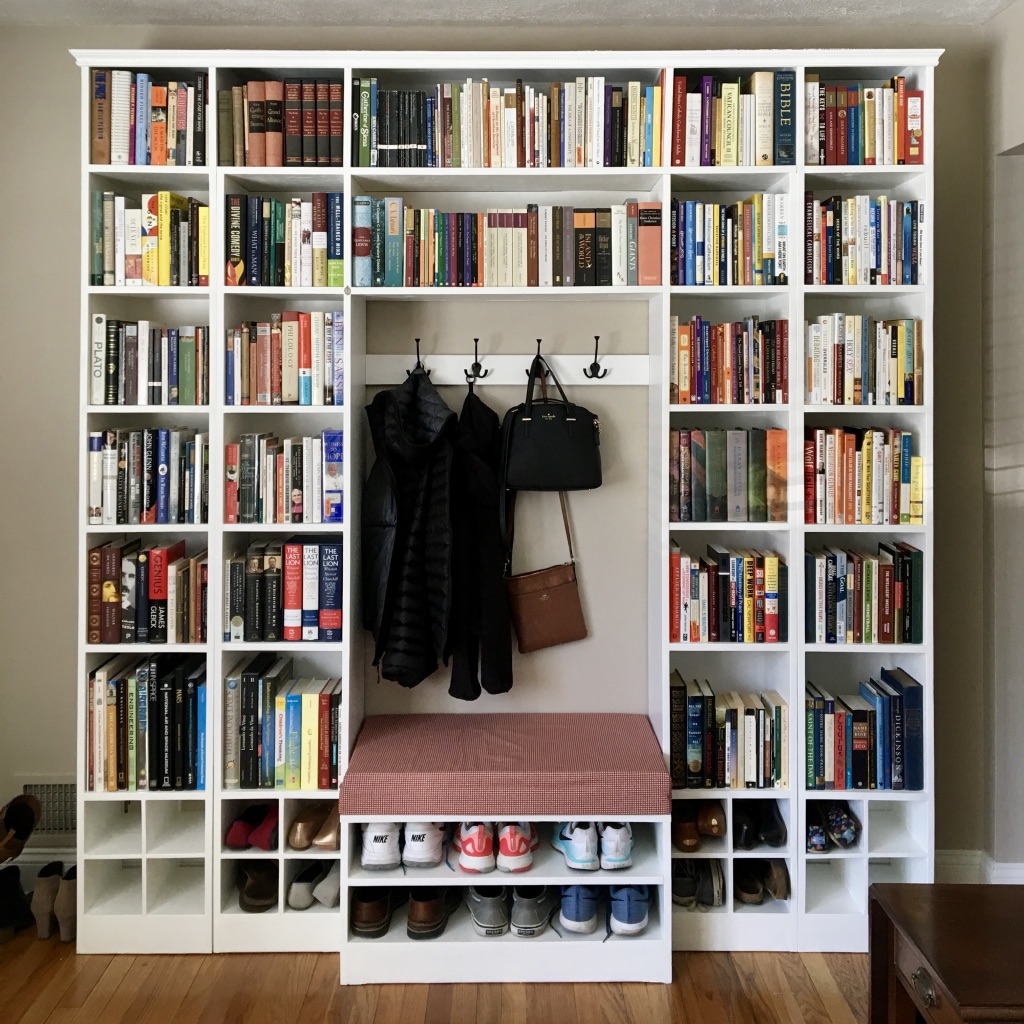
Moving into a new house comes with lots of projects: the most important of which, naturally, involve bookshelves and books. This build log chronicles the design, construction, and expansion of a large bookshelf.
Design
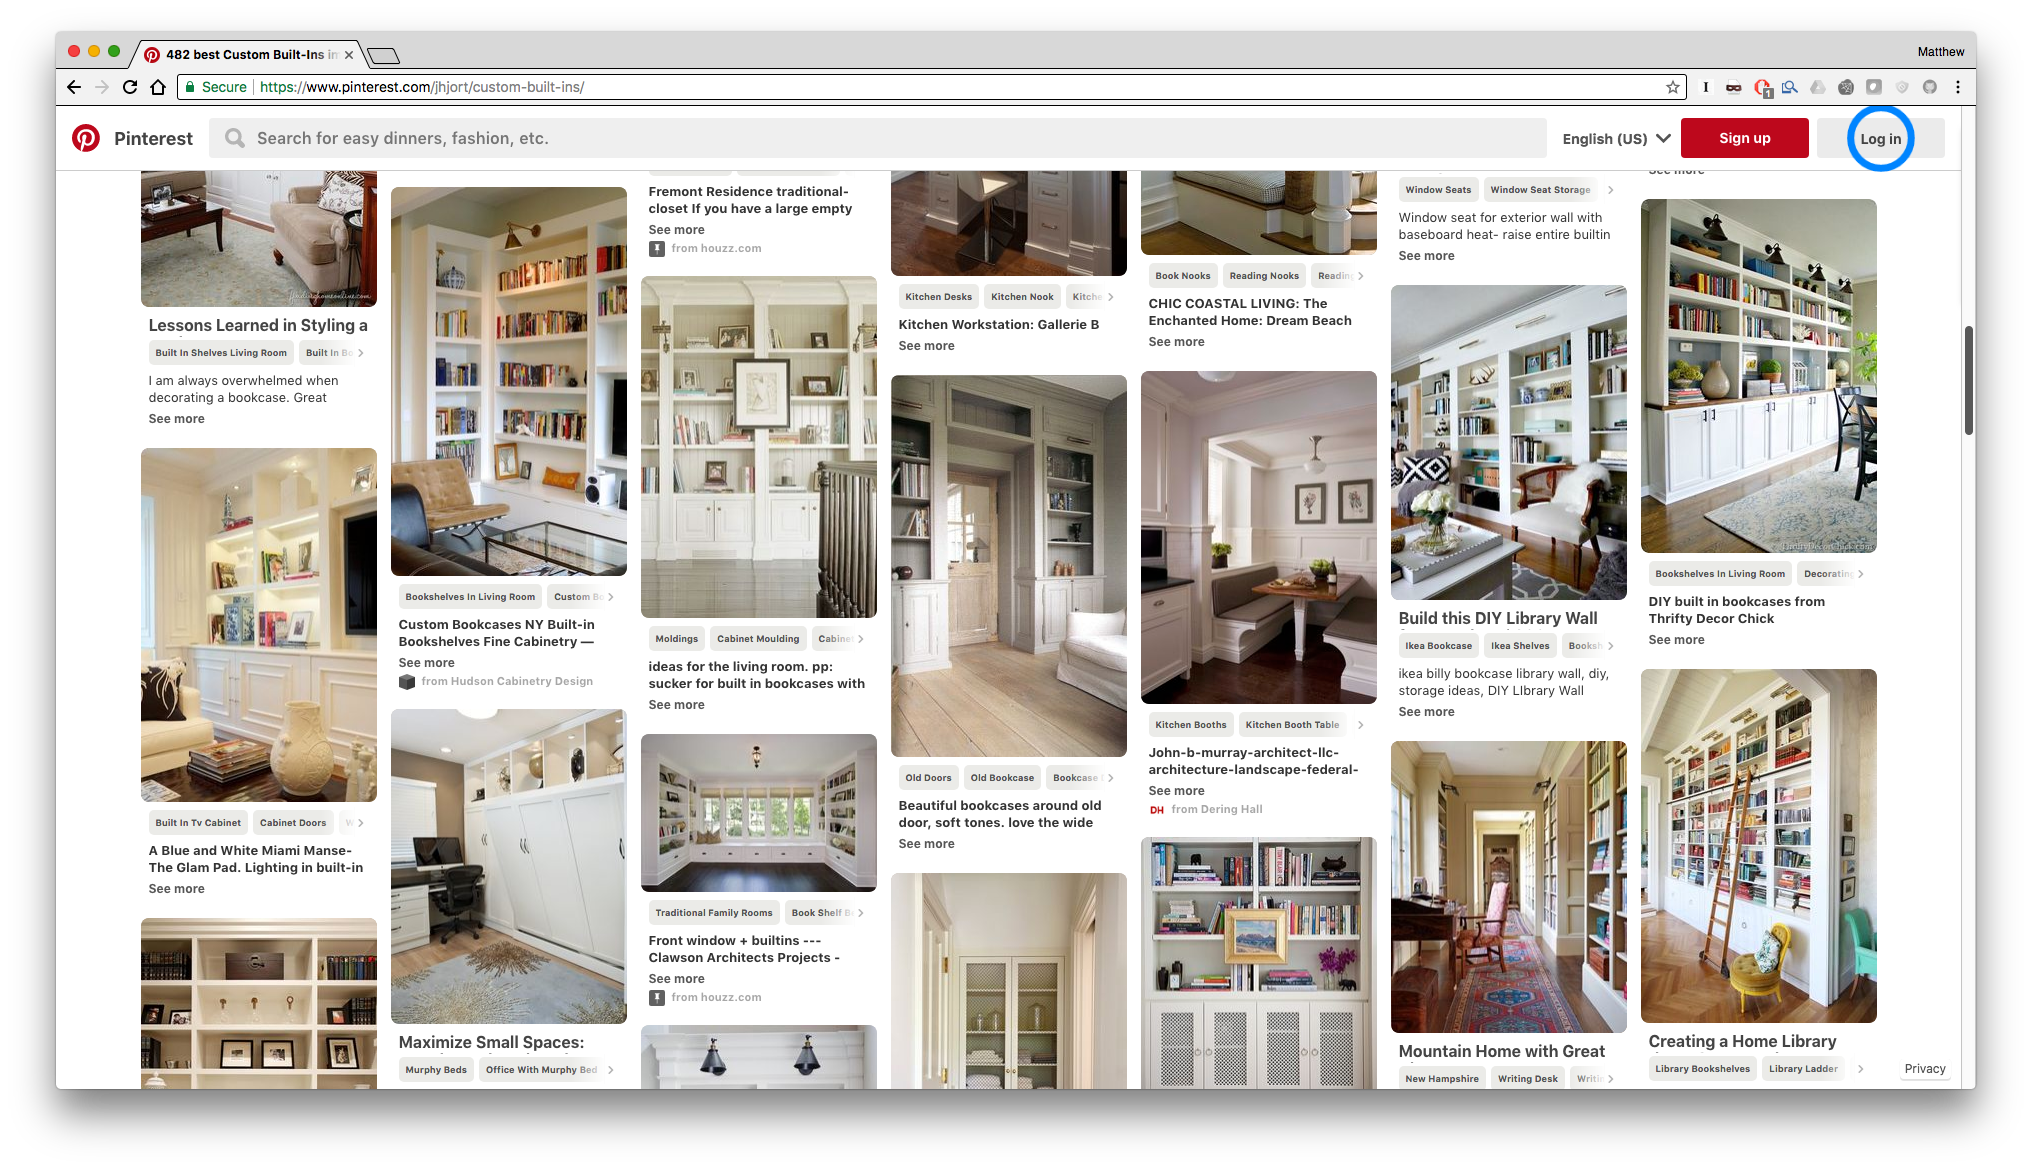
Pinterest is great for seeing lots of ideas for different configurations and construction techniques.
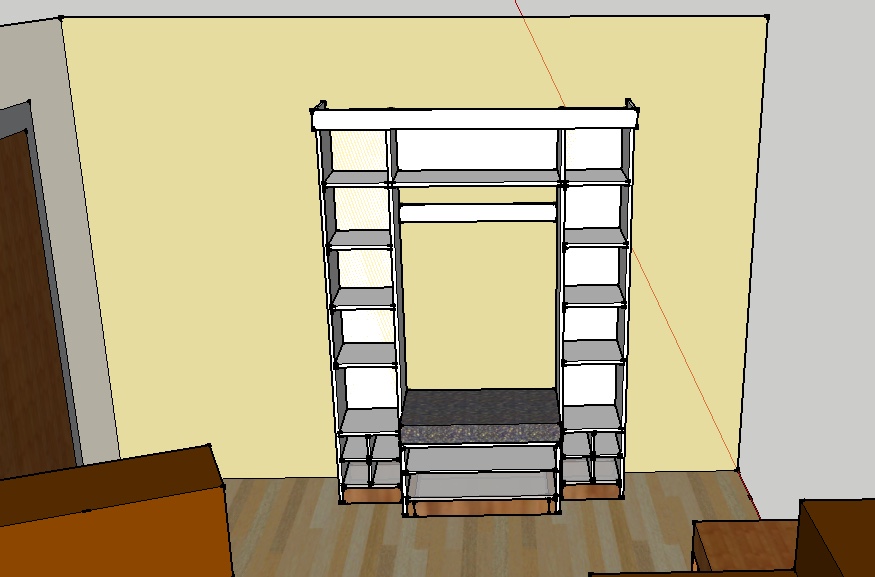
At a high level my goal was to construct a simple bookshelf that also includes space for coats and shoes since it is situated near the front door. I used SketchUp to model the bookshelf and make sure it would look appropriate in the room. SketchUp is quick and easy enough to use to allow for iteration and redesign as required. You can download the SketchUp file here
After completing the design, I arranged the pieces on 4' x 8' rectangles—while leaving room for cuts—to estimate how many sheets of wood are required.
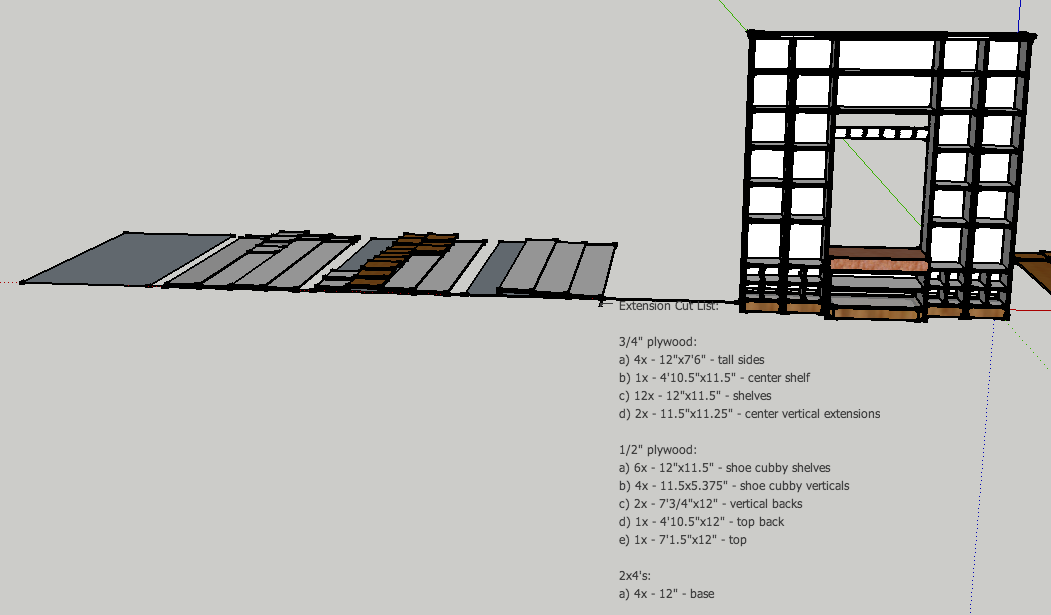
A few quick notes on dimensions: I chose to use 3/4" plywood for the shelves, which are 12" wide, 12" deep, and 12" high forming a cube. Using a 3/4" thick shelf on a 12" span is overkill but I prefer plenty of margin and not needing to worry about sag. If you are concerned about shelf sag you can study solid mechanics or use one of many online calculators to verify sag will be within acceptable limits.
Build
Materials Required
| Material | Quantity | Description |
|---|---|---|
| 3/4" plywood | 4 sheets (8'x4') | Primary structure (sides, shelves) |
| 1/2" plywood | 3 sheets (8'x4') | Secondary structure (back, cubbies) |
| 2x4s | 1-2 (8' studs) | Base structure |
| Crown molding | 1-2 (8' pieces) | Decorative finish |
| Cardboard | 1 sheet | top/back of expanded shelf |
| White Primer | 1 gallon | Bulls Eye 1-2-3 Primer (1-coat) |
| White Paint | 1 gallon | Valspar Optimus (2-coats) |
| #5 1" Screws | ~100 | Securing shelves |
| 1 1/4" Pocket Screws | 8 | Finishing |
| Foam | 2" thick | Cushion material |
| Fabric | As required | Cushion cover |
| Zipper | As required | Cushion cover |
| Hooks | 4 | Coat rack |
| 1x4s | 1 | Coat rack |
| Sandpaper | As required | 120 and 220 grit |
| Joint Compound | As required | For filling holes |
Tools Required
- Circular saw
- Jig saw
- Electric drill
- Bora clamp edge
- Assorted clamps
- Square
- Tape measure
- Sander
- Saw-horses
- Pocket hole jig (optional)
- Paint brushes
- Paint roller
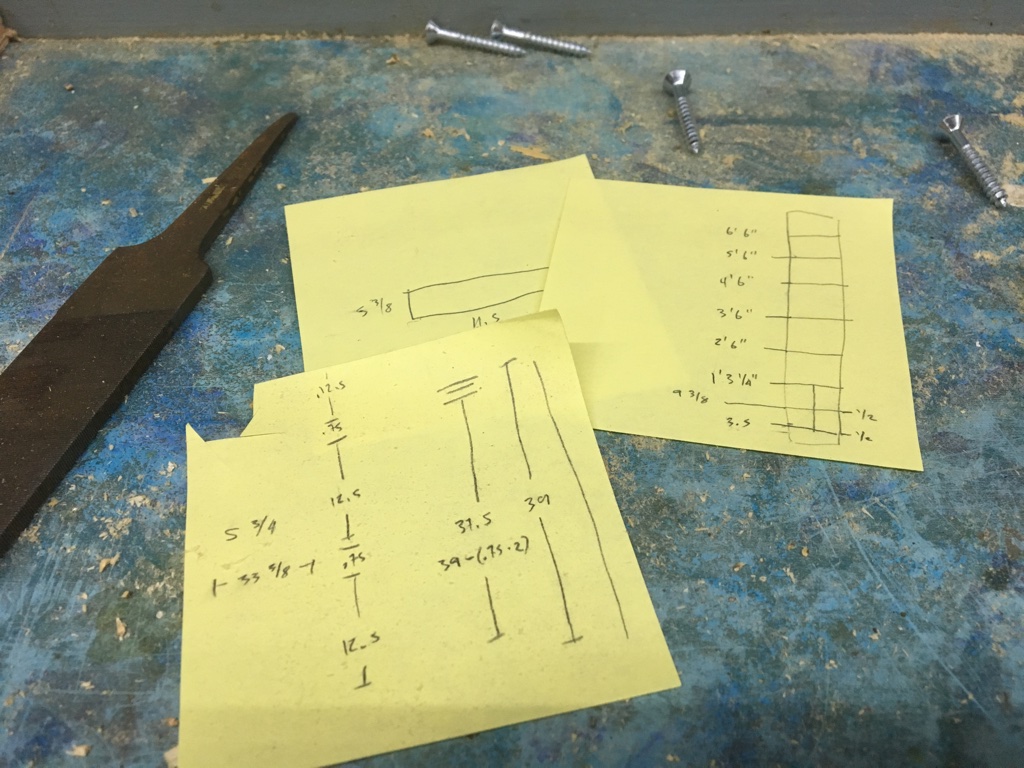
With the design complete and the required tools and materials in hand I got started. I transcribed the cut list to post-it notes to work with.
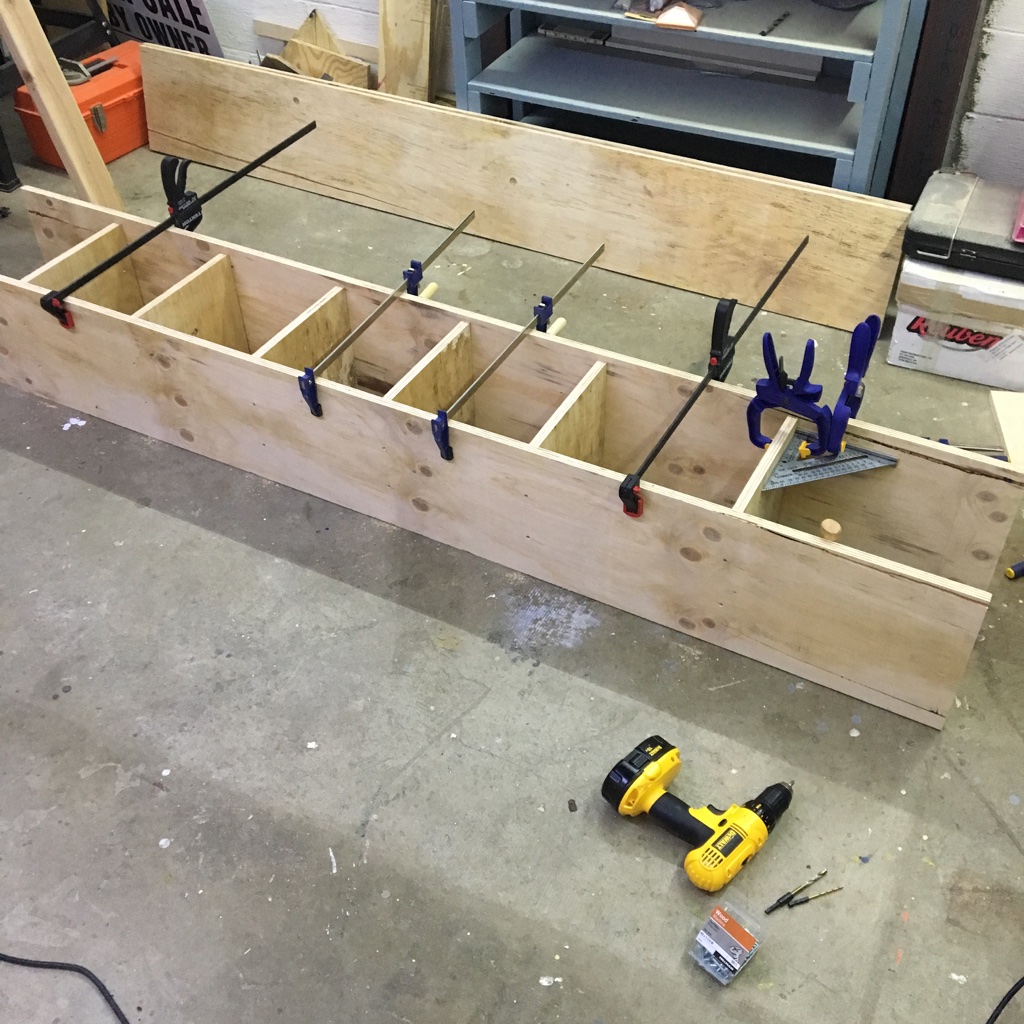
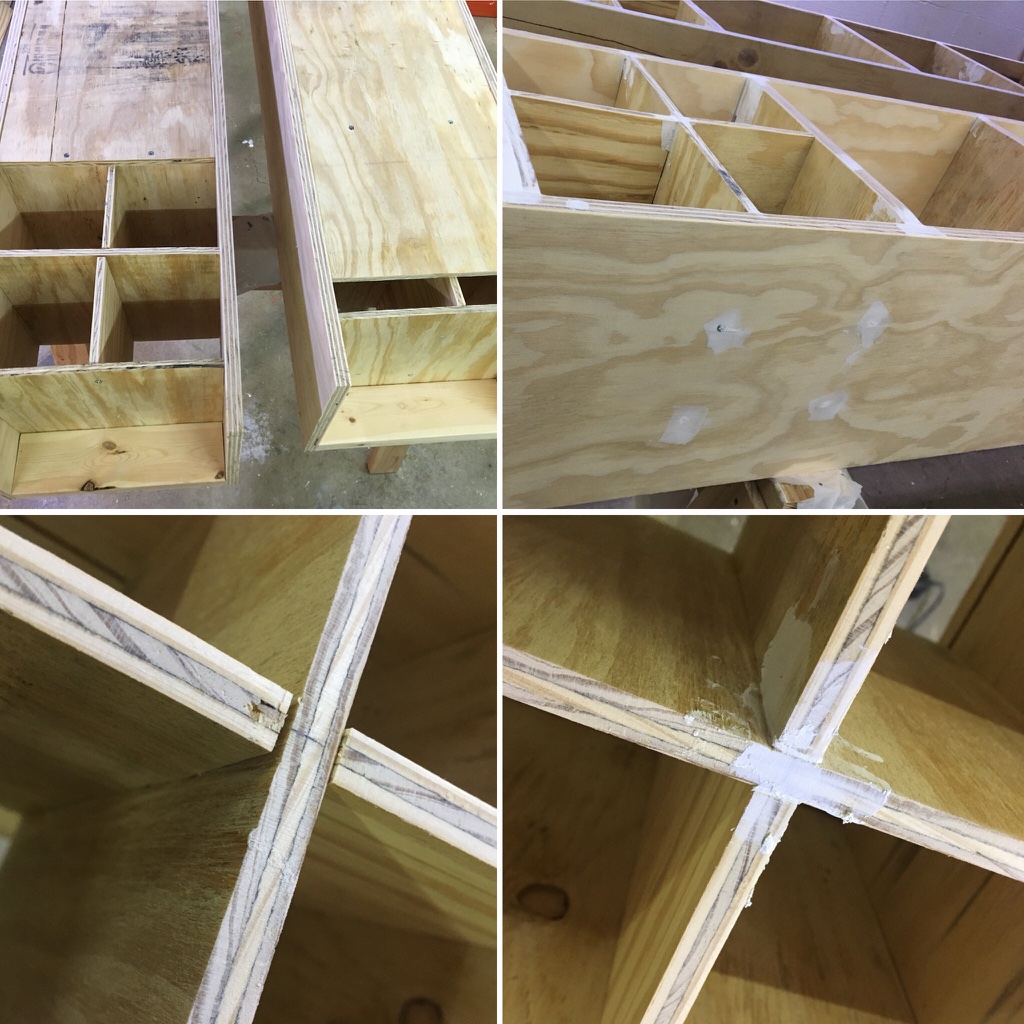
I used the Bora cutting guide to rip the plywood sheets down to size. Laying out the individual pieces on the sheets when designing saves a lot of time when cutting. Once all pieces were cut, I assembled the vertical "towers". Two screws hold each shelf, and the installation procedure is to measure and space shelves, clamp, drill pilots, drill counterbore to bury heads completely, and then install screws.
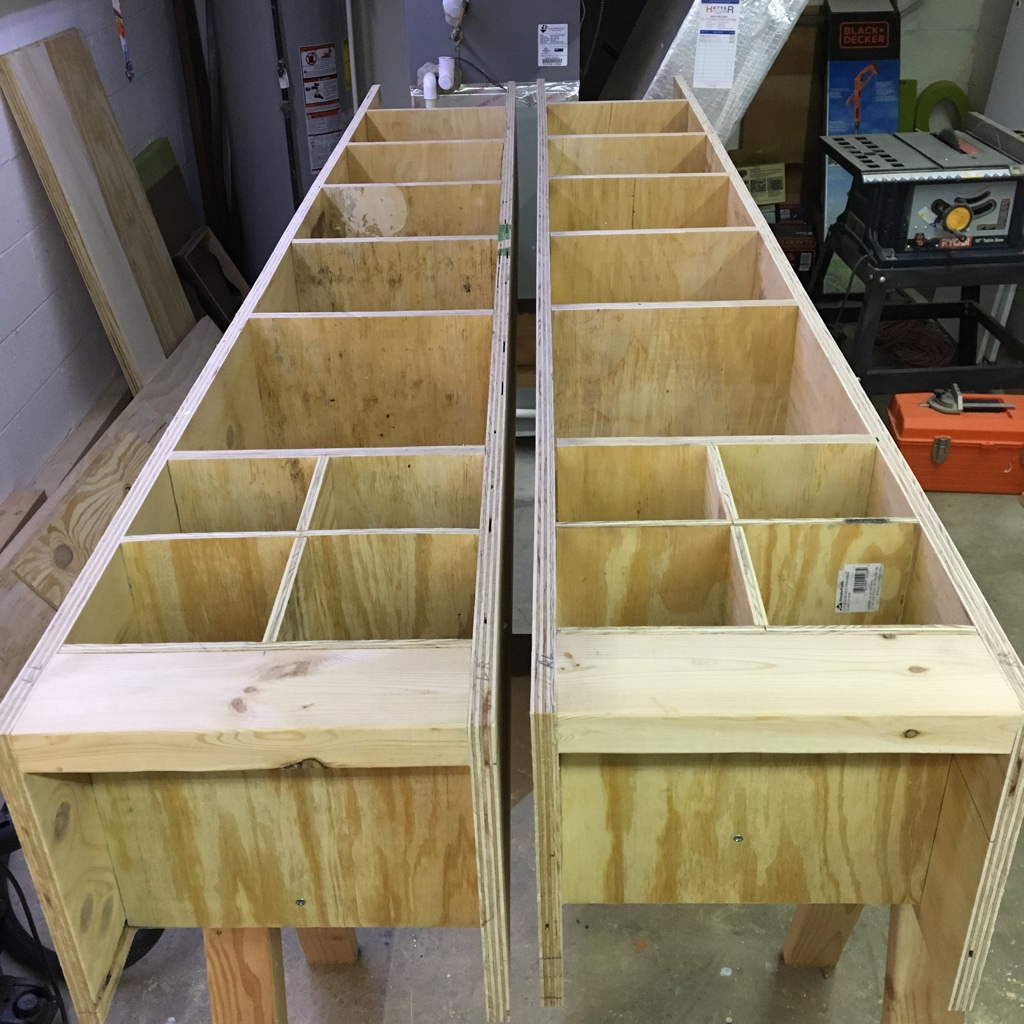
Once the shelves are installed, I attached the 1/2" plywood back. This is overkill for a back, but gives great shear stiffness—this bookshelf is sturdy.
After similarly assembling the center section with screws, I arranged it to get a peek at how the final product will look.
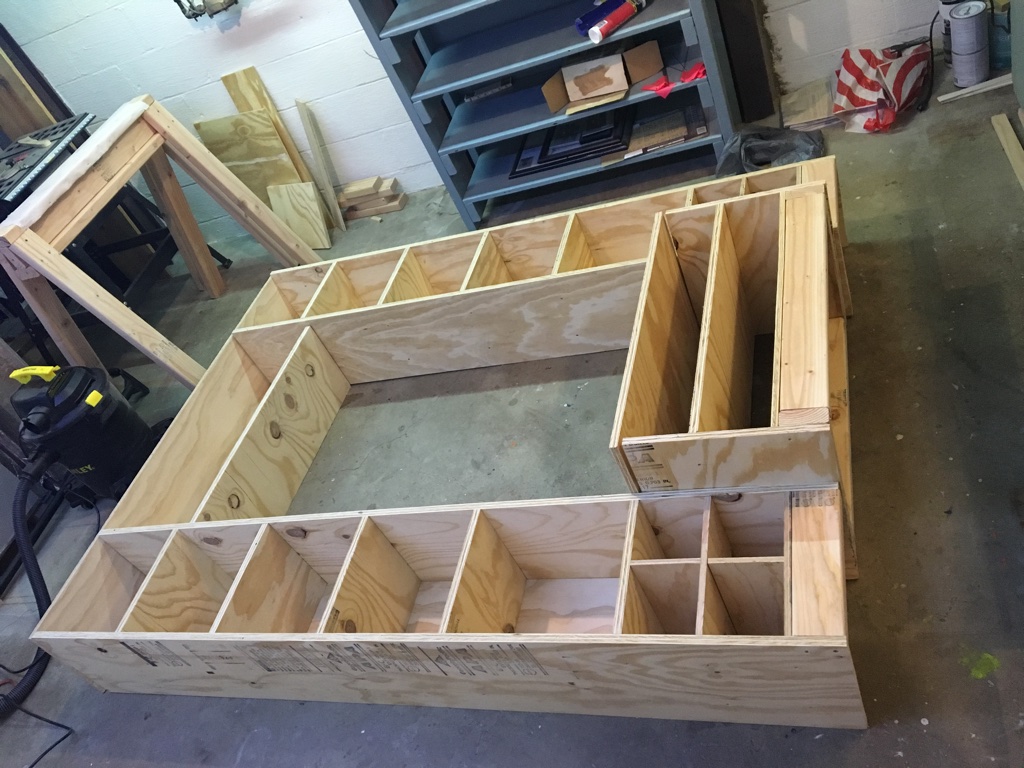
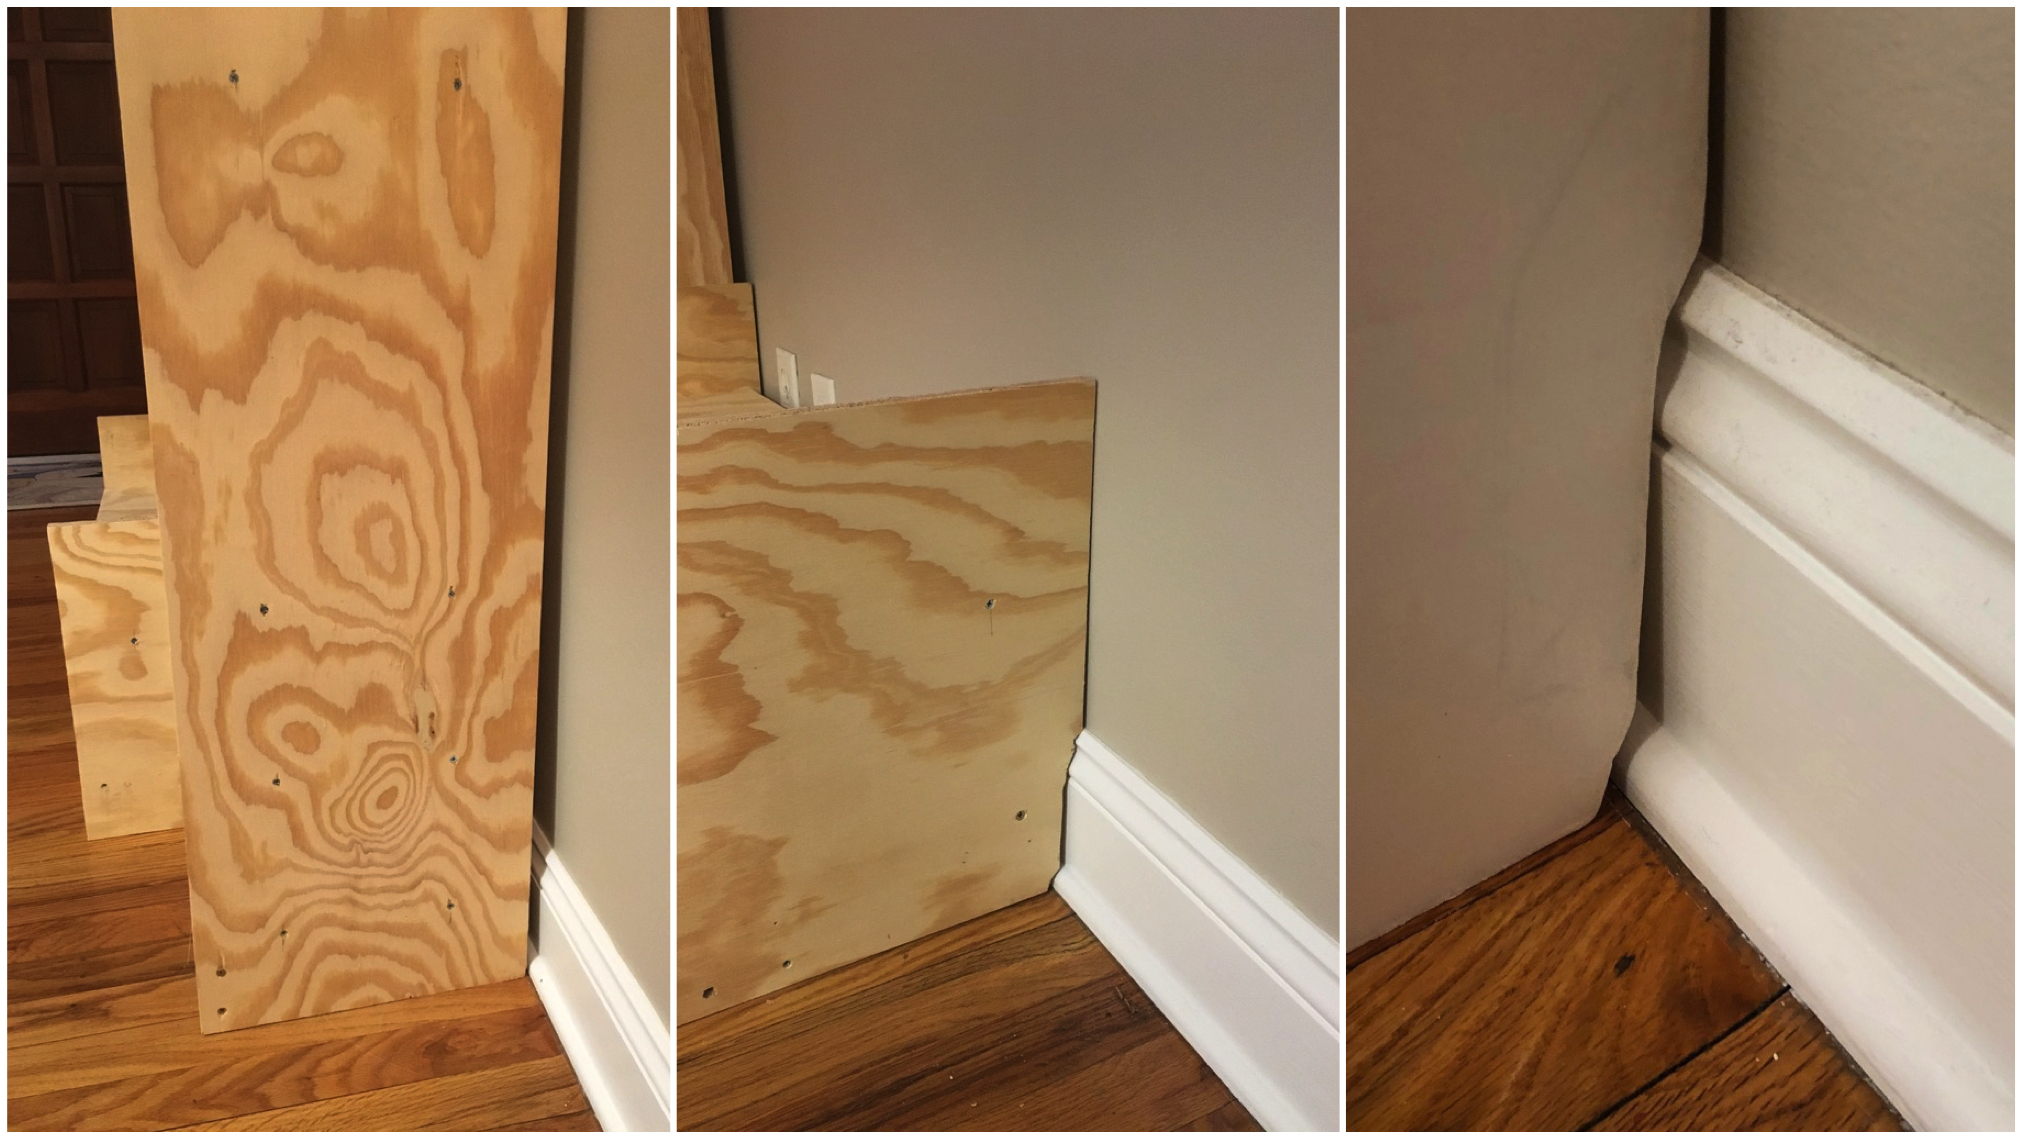
I did not want to remove any base-board, so I cut away a section at the base of the bookshelf with a jig saw and performed some test fits to ensure it can fit nicely against the wall.
Before sanding, I filled all holes and imperfections with joint compound.
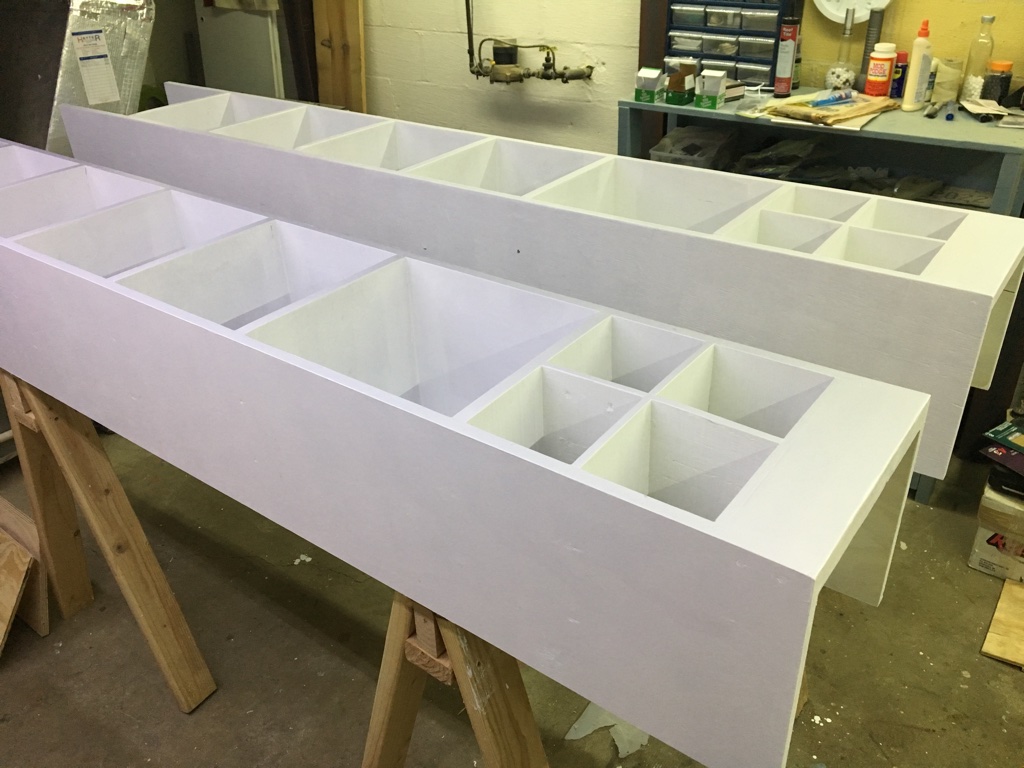
Next comes sanding: first with coarse 120 grit and then with fine 220 grit sandpaper. Painting was the most tediuous part, taking at least a couple of hours per coat to brush all edges and corners and then roll larger spaces. I painted on a coat of primer and then two coats of white Valspar paint, with a light fine sanding before the final coat.
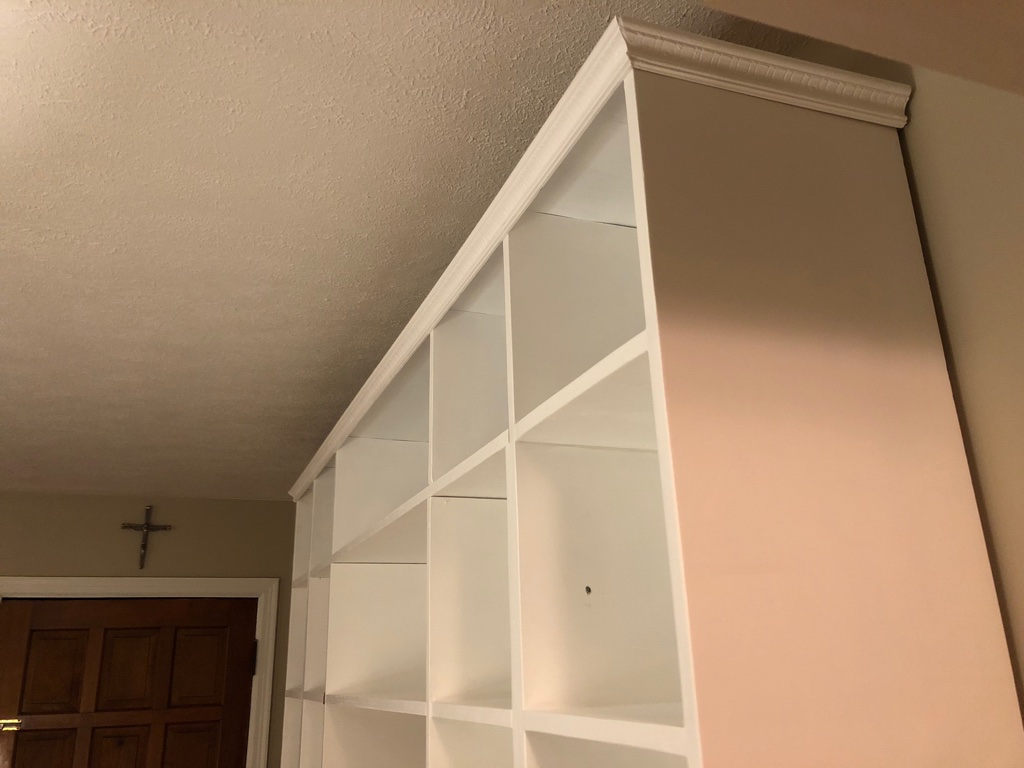
With the sections all painted it was time to assemble them together. Several 1 1/2" screws secure the towers to the center section, and some pocket holes secure the shelf spanning the middle. The final step is to cut the crown molding at a 45° angle and install with small nails along the top edge.
I cut the foam to size and satcked two 2" sheets together to make a simple cushion. My wife sewed the fabric cover which includes a zipper at the back to keep it all together.
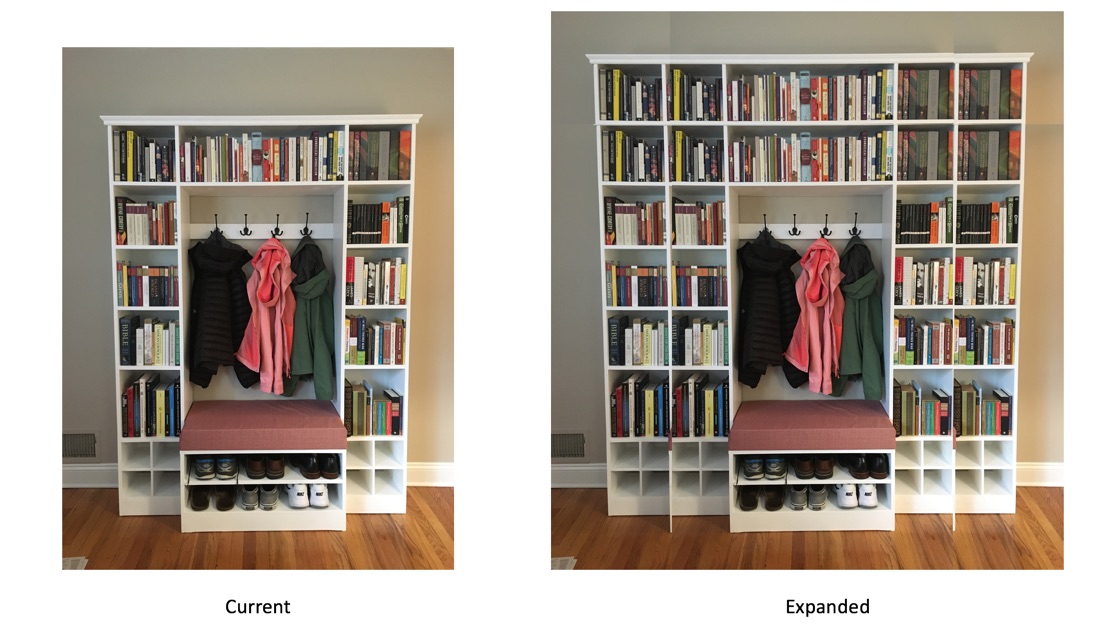
The Expansion
About a year after the initial construction I decided to expand the bookshelf to take more advantage of the wall it sits on. This involved building two additional side towers and an extra shelf across the top to join them. The build process was straightforward having been through it once before.
Closing Thoughts
I'm very pleased with the outcome. If I were to do this over I would have started with the "expanded" version in mind and made the shelves wider to reduce the amount of vertical sides and save some material and weight.