Build Log: Console Table

I built a simple console table to organize items by the back door.
Design
I looked online for some ideas and found a number of good examples to work from.
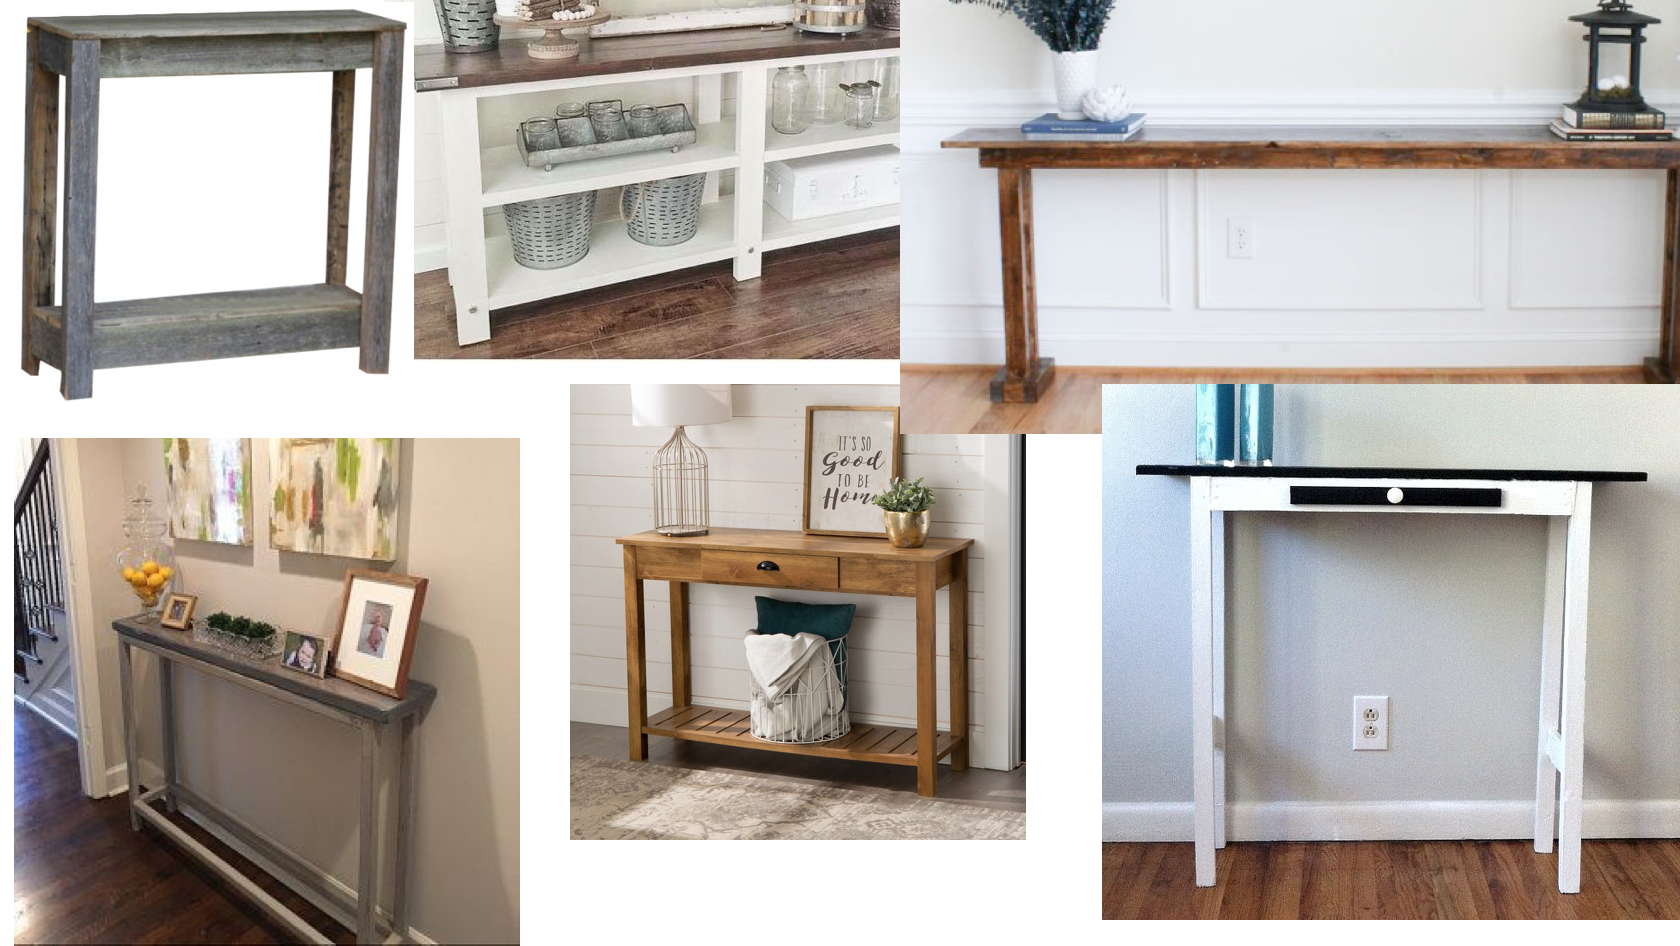
My goal with this project was to use exclusively biscuit joints with no metal fasteners. I wanted a simple and quick build using wood I had on hand, which ended up being 1x4s and 1x2s.
Build
Materials Required
| Material | Quantity | Description |
|---|---|---|
| 1x4s | 2 | top shelf, legs |
| 1x2s | 1 | feet |
| 7/8” Screw-on gliders | 4 | adjustible gliders to level |
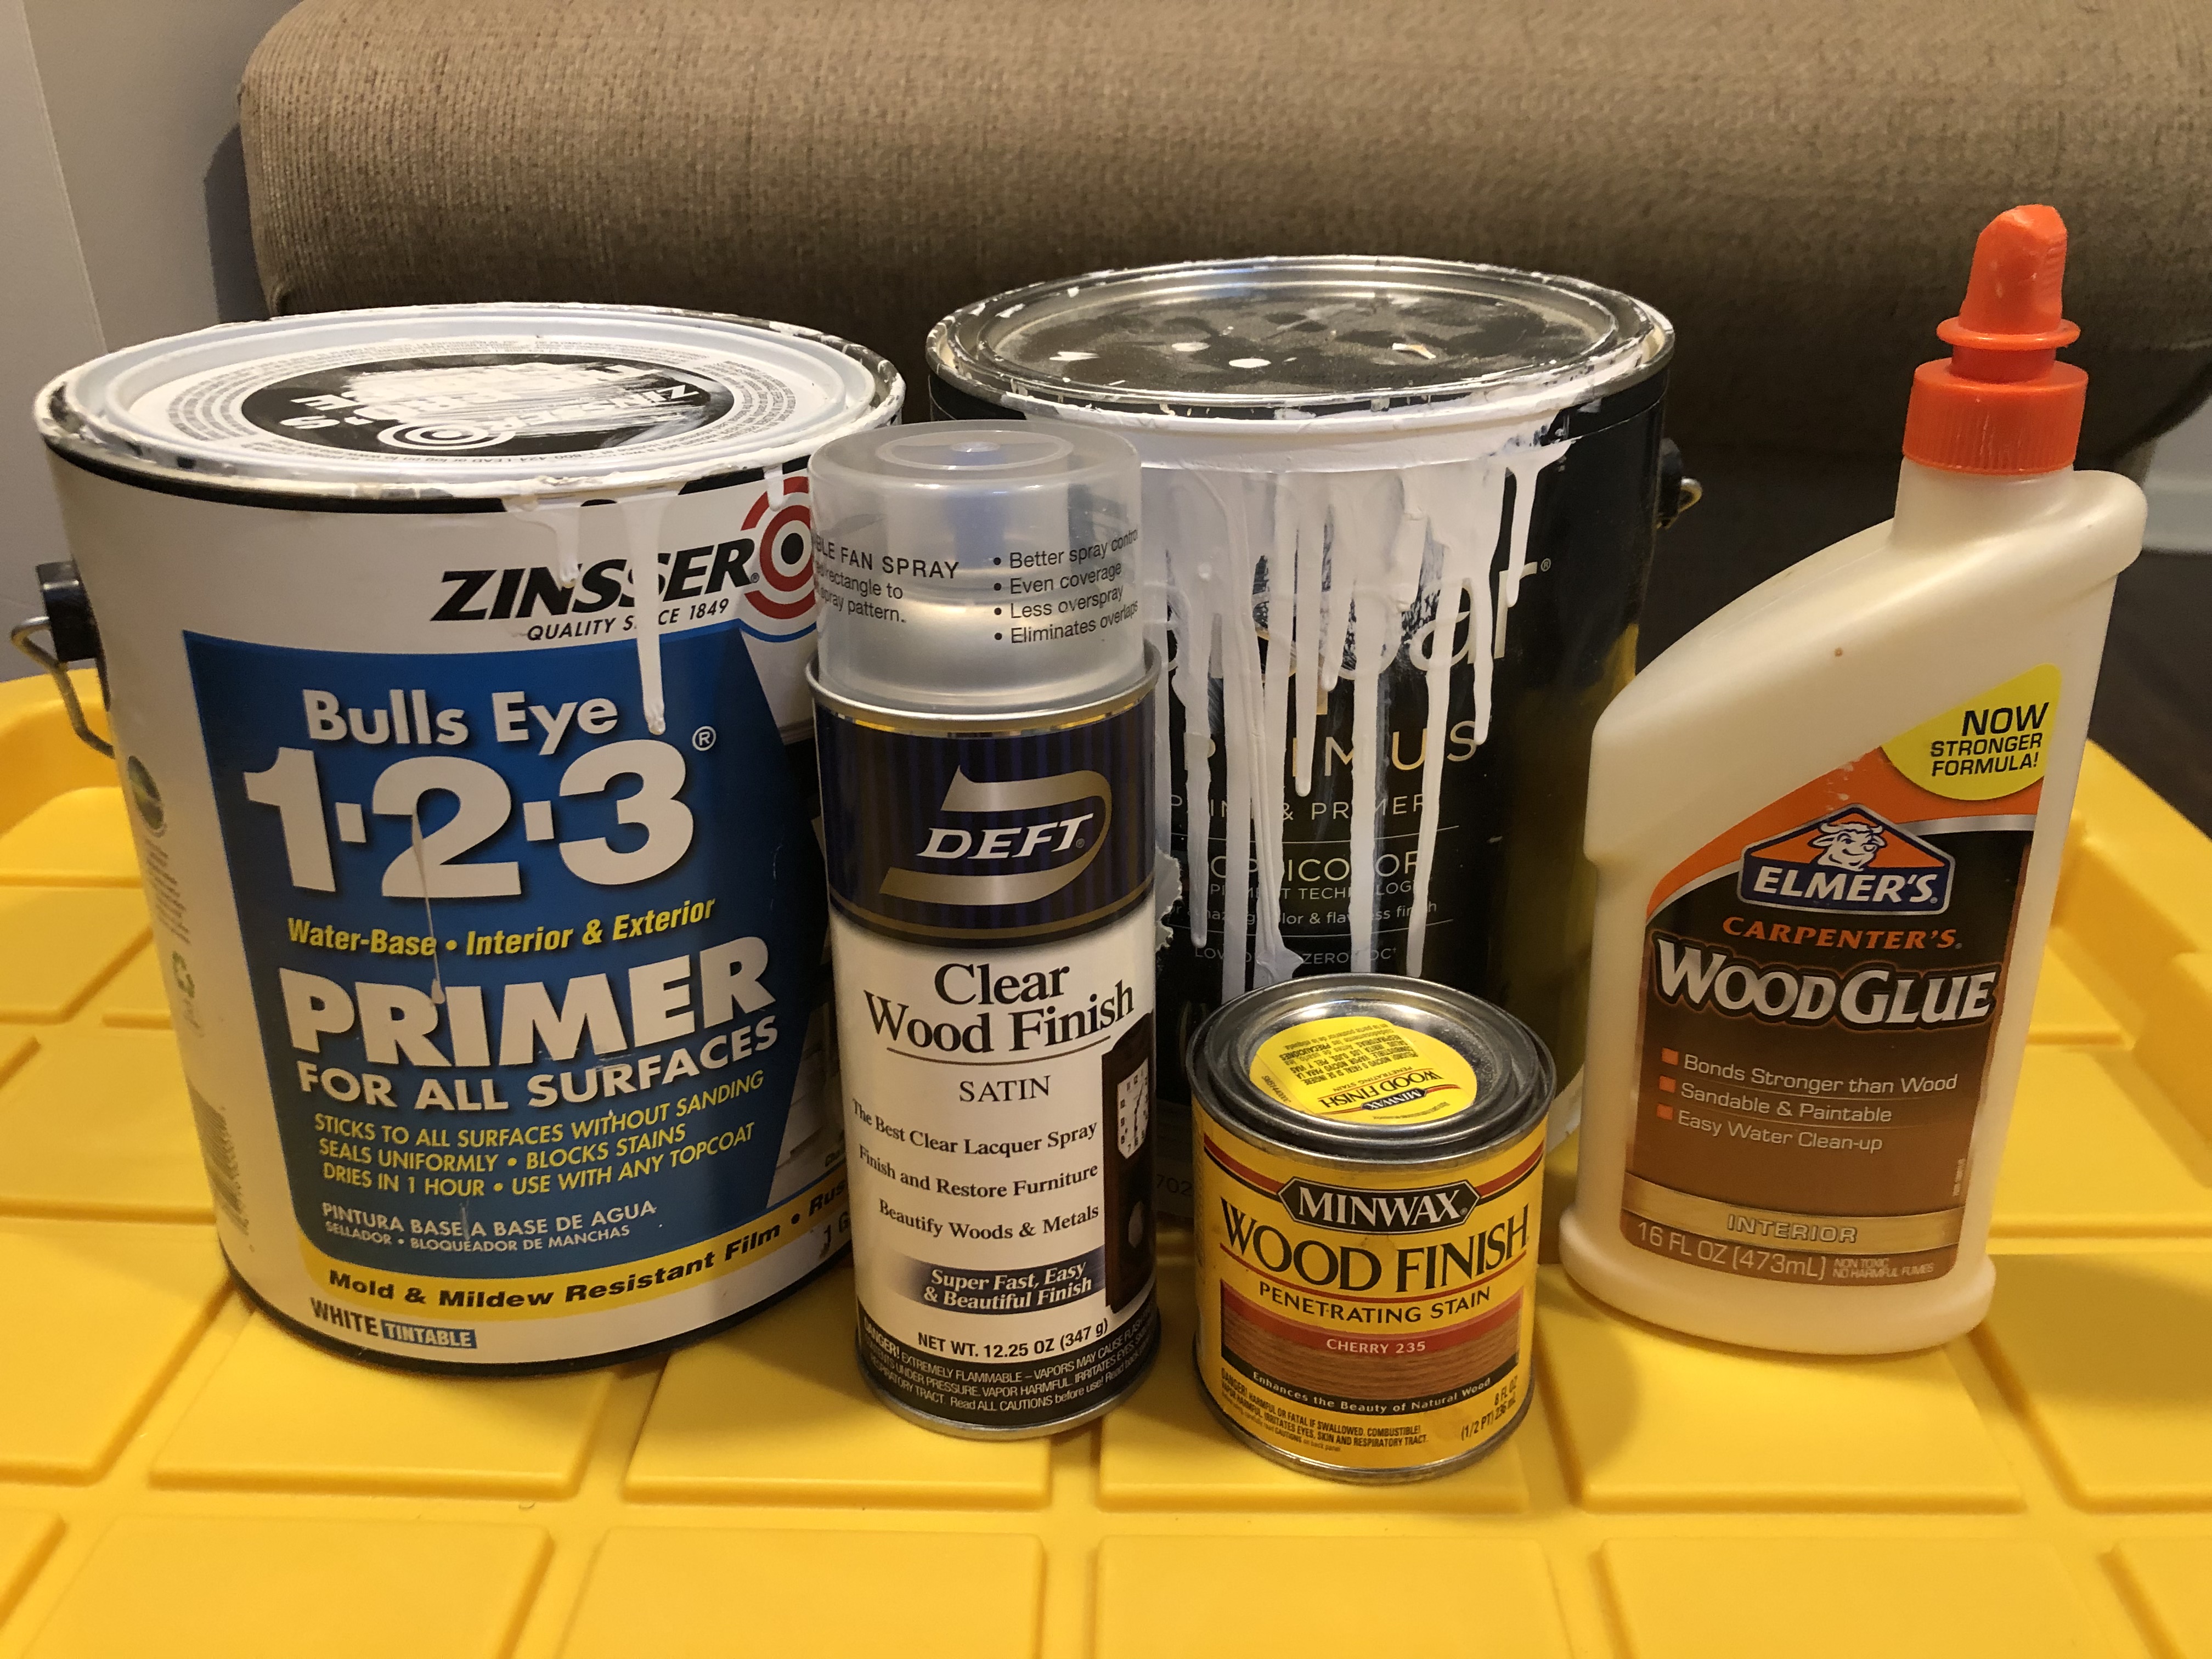
| White Primer | 1 gallon | Bulls Eye 1-2-3 Primer (1-coat) |
| White Paint | 1 gallon | Valspar Optimus (1-coat) |
| Stain | As required | Miniwax Cherry 235 |
| Lacquer | As required | Deft Clear Wood Finish Satin |
| Wood Glue | As required | Elmer's Wood Glue |
| Sandpaper | As required | 120 and 220 grit |
Tools Required
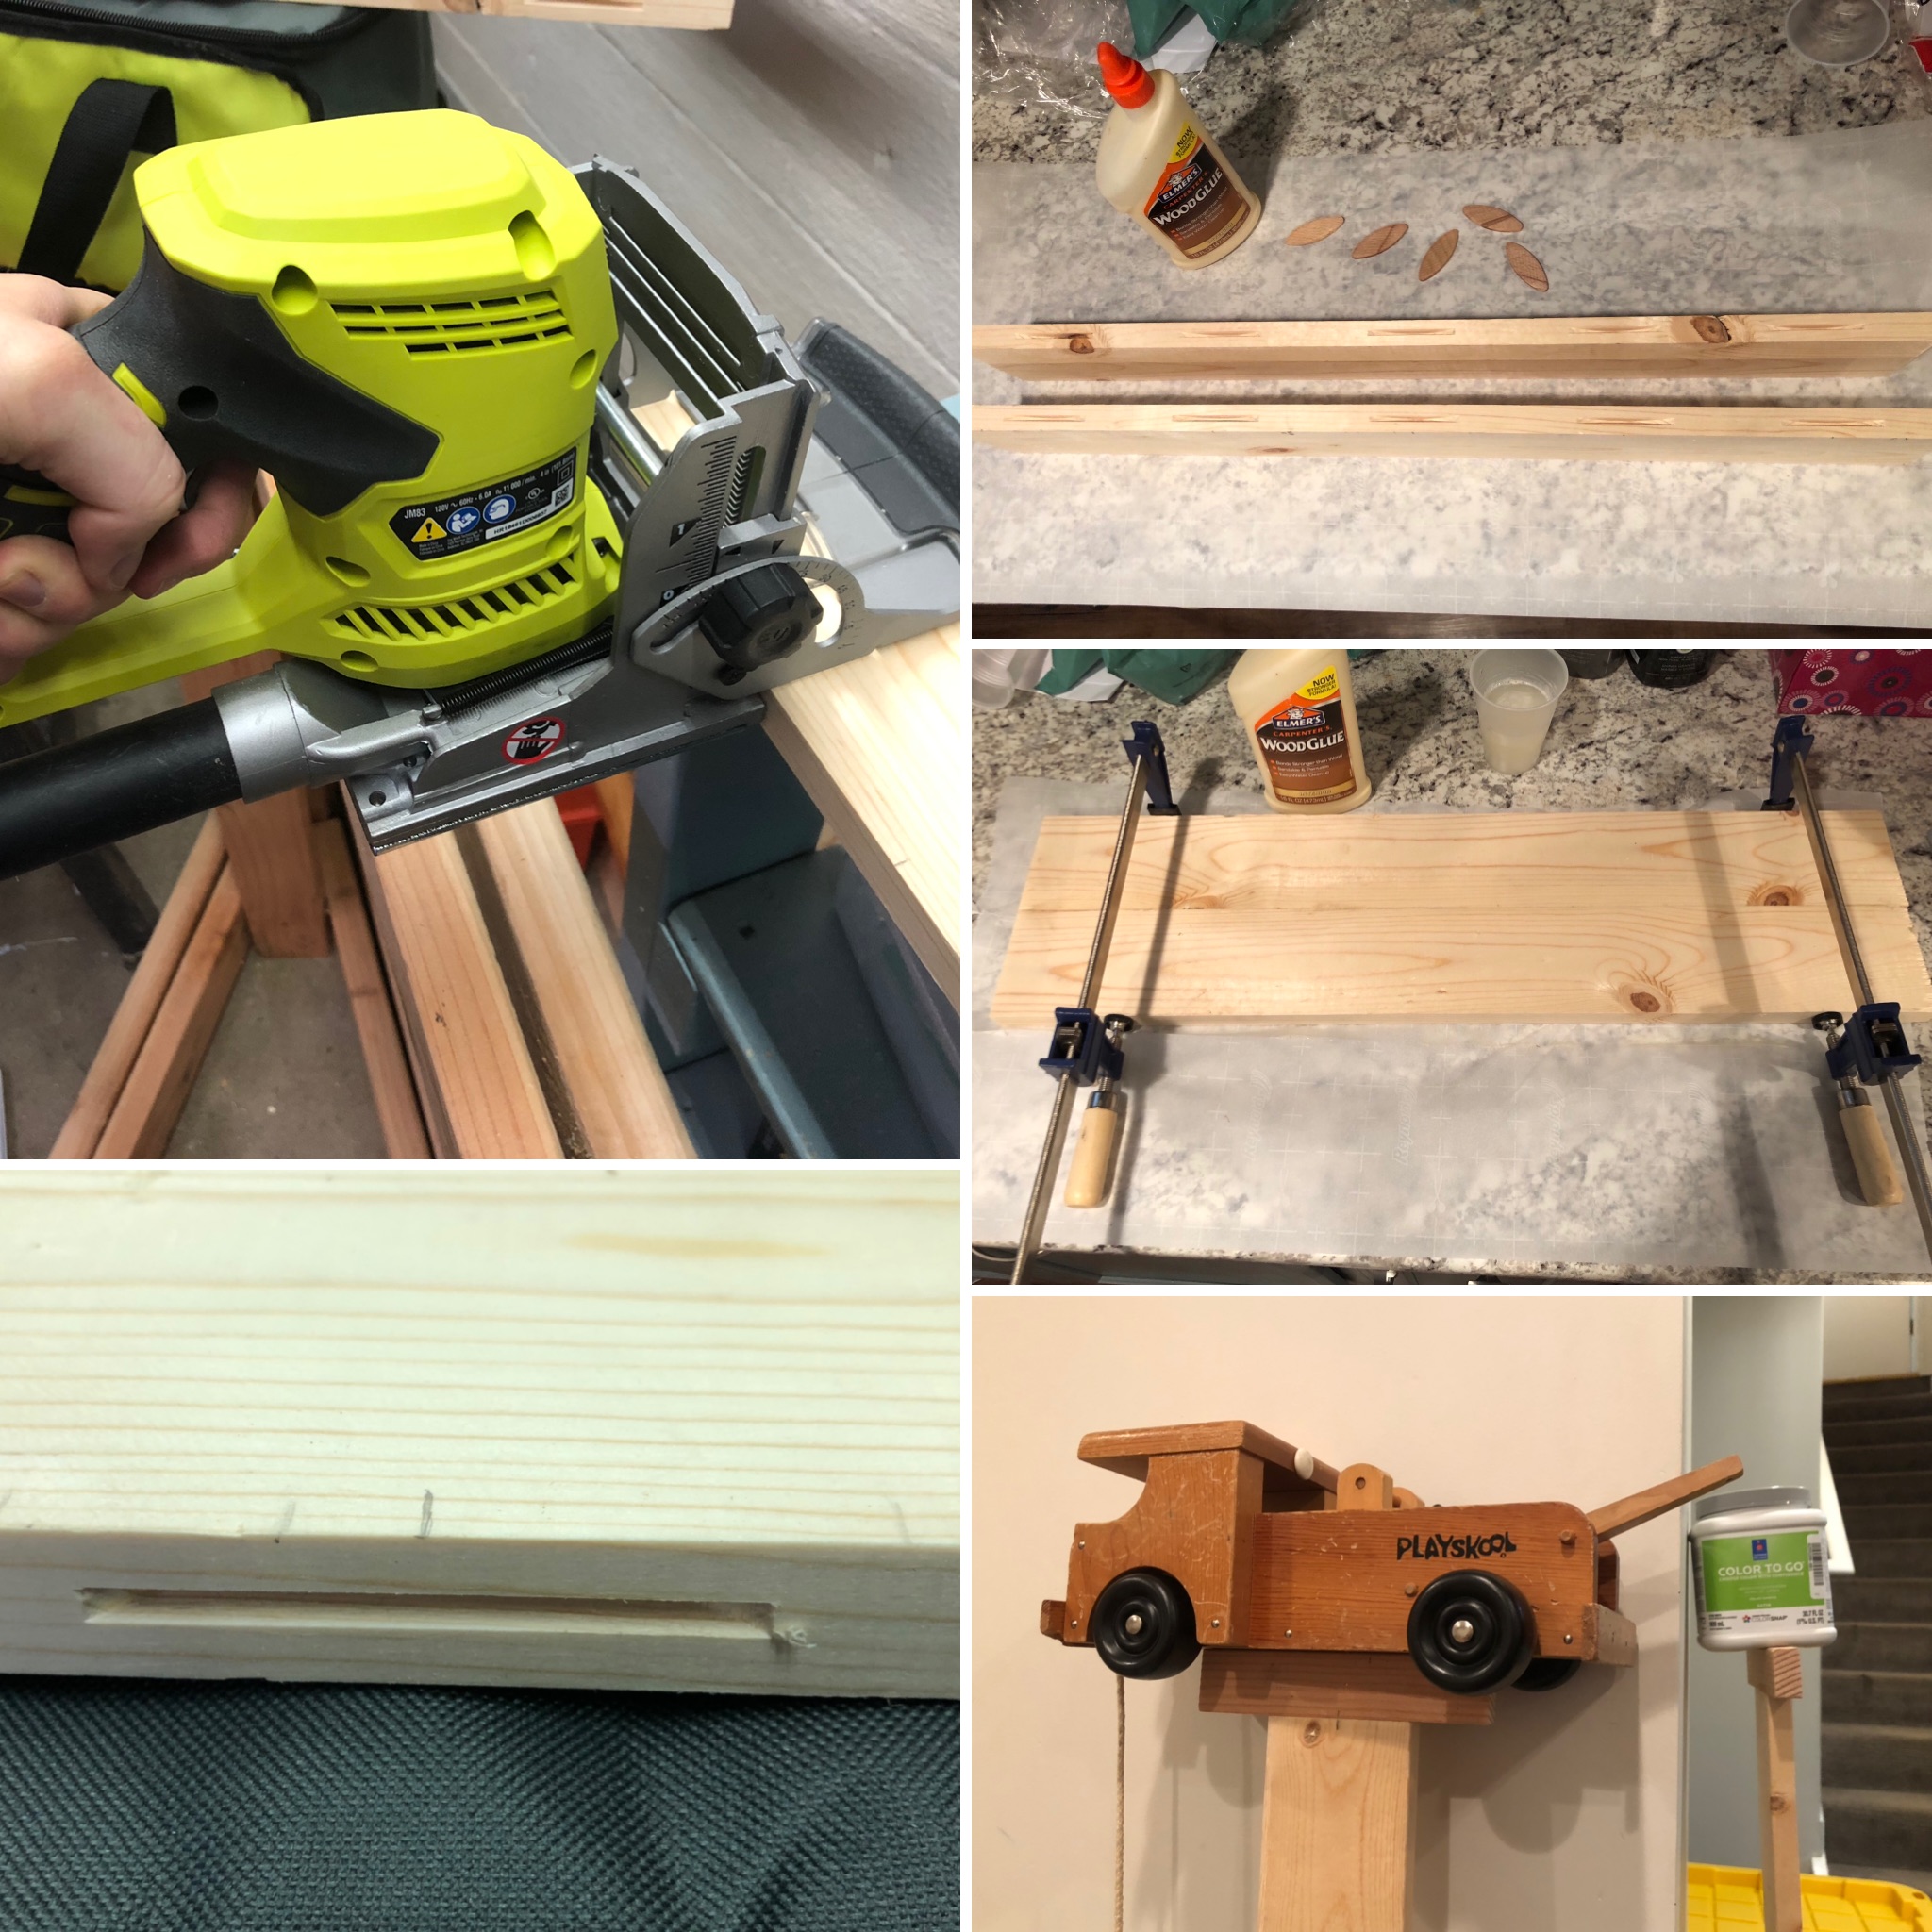
- Miter saw
- Biscuit joiner
- Clamps
- Square
- Tape measure
- Sander
- Paint brushes
- Router
I started by cutting two 1x4s to length to form the top surface. I cut biscuit holes and then glued and clamped these. While the top dried, I cut the legs and feet, cut biscuit holes, and glued these up. When the tabletop was dry, I trimmed the ends and used a router to cut a nice edge.
I chose to stain the top and paint the remainder white. For stain I used Miniwax Cherry 235, finished with several coats of Deft Clear Wood Finish, which is the same finish I have been using for wood carvings as well. For the painted surfaces I primed with Bulls Eye 1-2-3 Primer, followed by a coat of Valspar Optimus paint.
The last step was to install 7/8” Screw-on gliders from ACE Hardware to level the table. Being very narrow it is not particularly stable and needs to be positioned near a wall.
