Build Log: Home Office
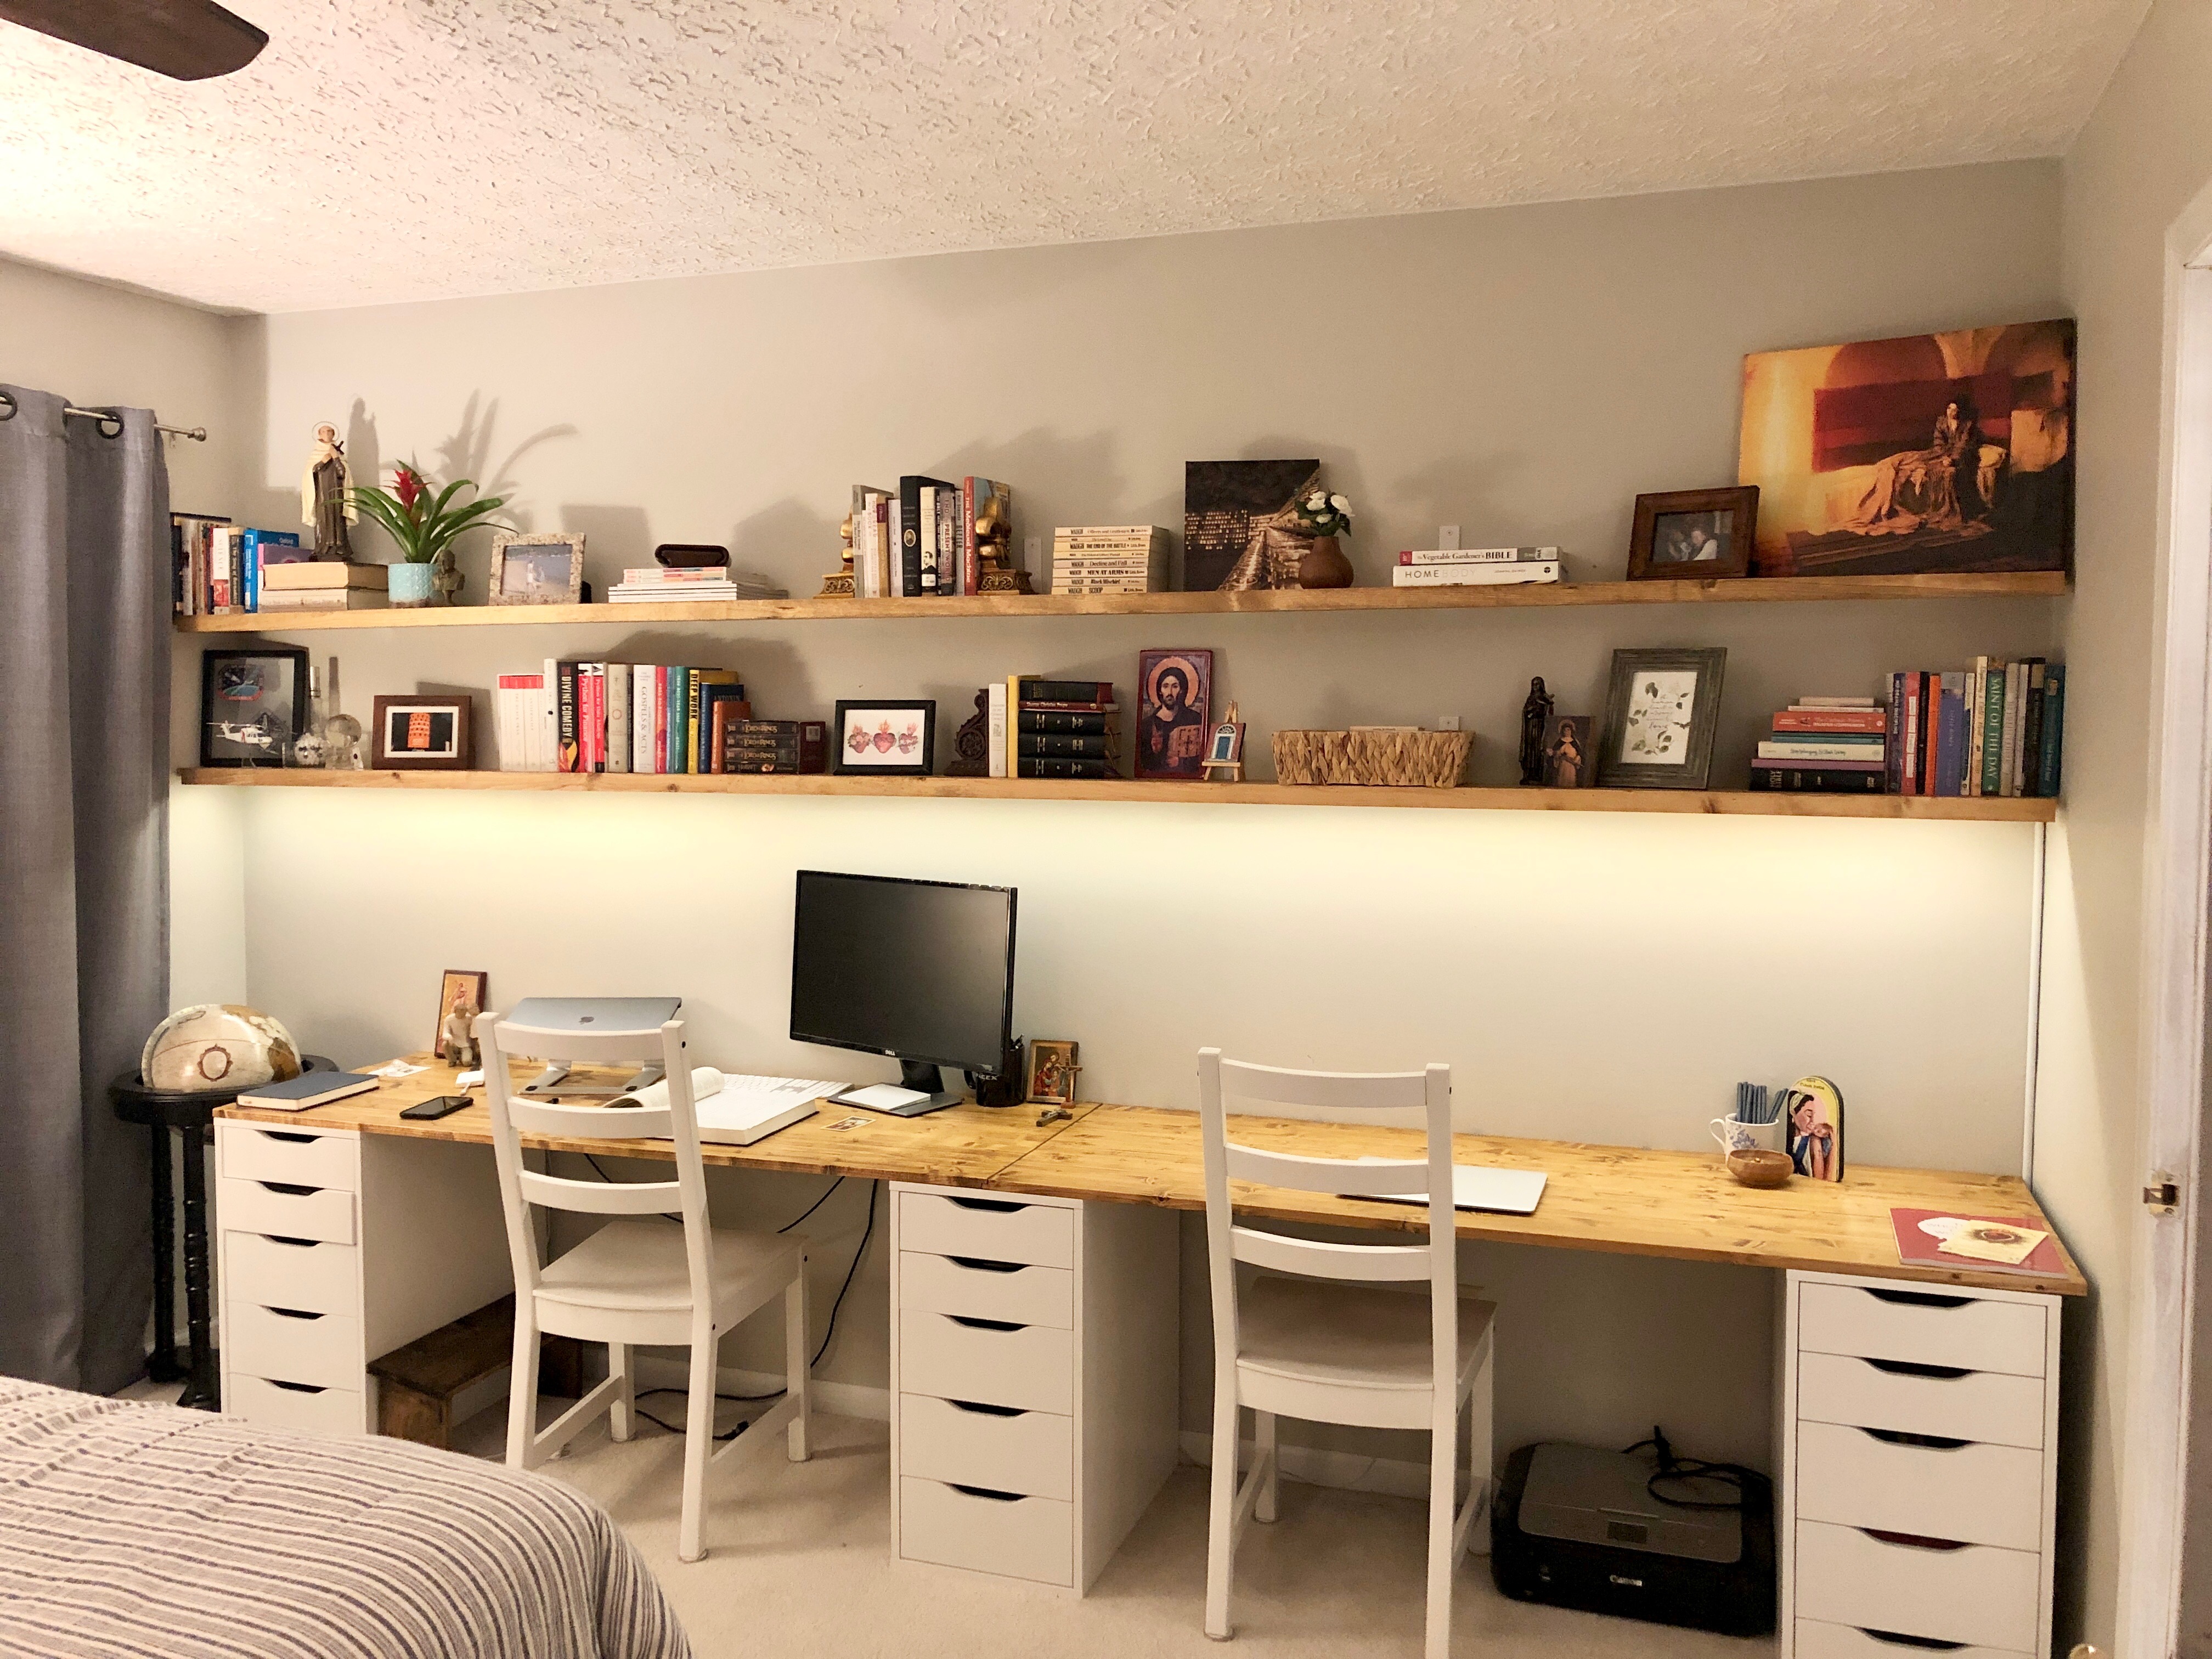
Remote work provided the motivation for a new home office. We wanted to maximize desk and shelf space in some existing dead space. To speed the project used some prefabricated components including IKEA drawers and pre-glued panels.
Design
We already had one IKEA Alex Drawer Unit and decided to use this as the base of the new desk. Incorporating two more gave plenty of drawer space with minimal effort.
For the desk tops, I prioritized speed and cost with the option to upgrade later. I got some pre-glued panels from Lowes, which only needed to be cut to length and finished. In the future, I would love to upgrade to a 2" hardwood (maybe walnut?) desk top, either live-edge or glued-up panel.
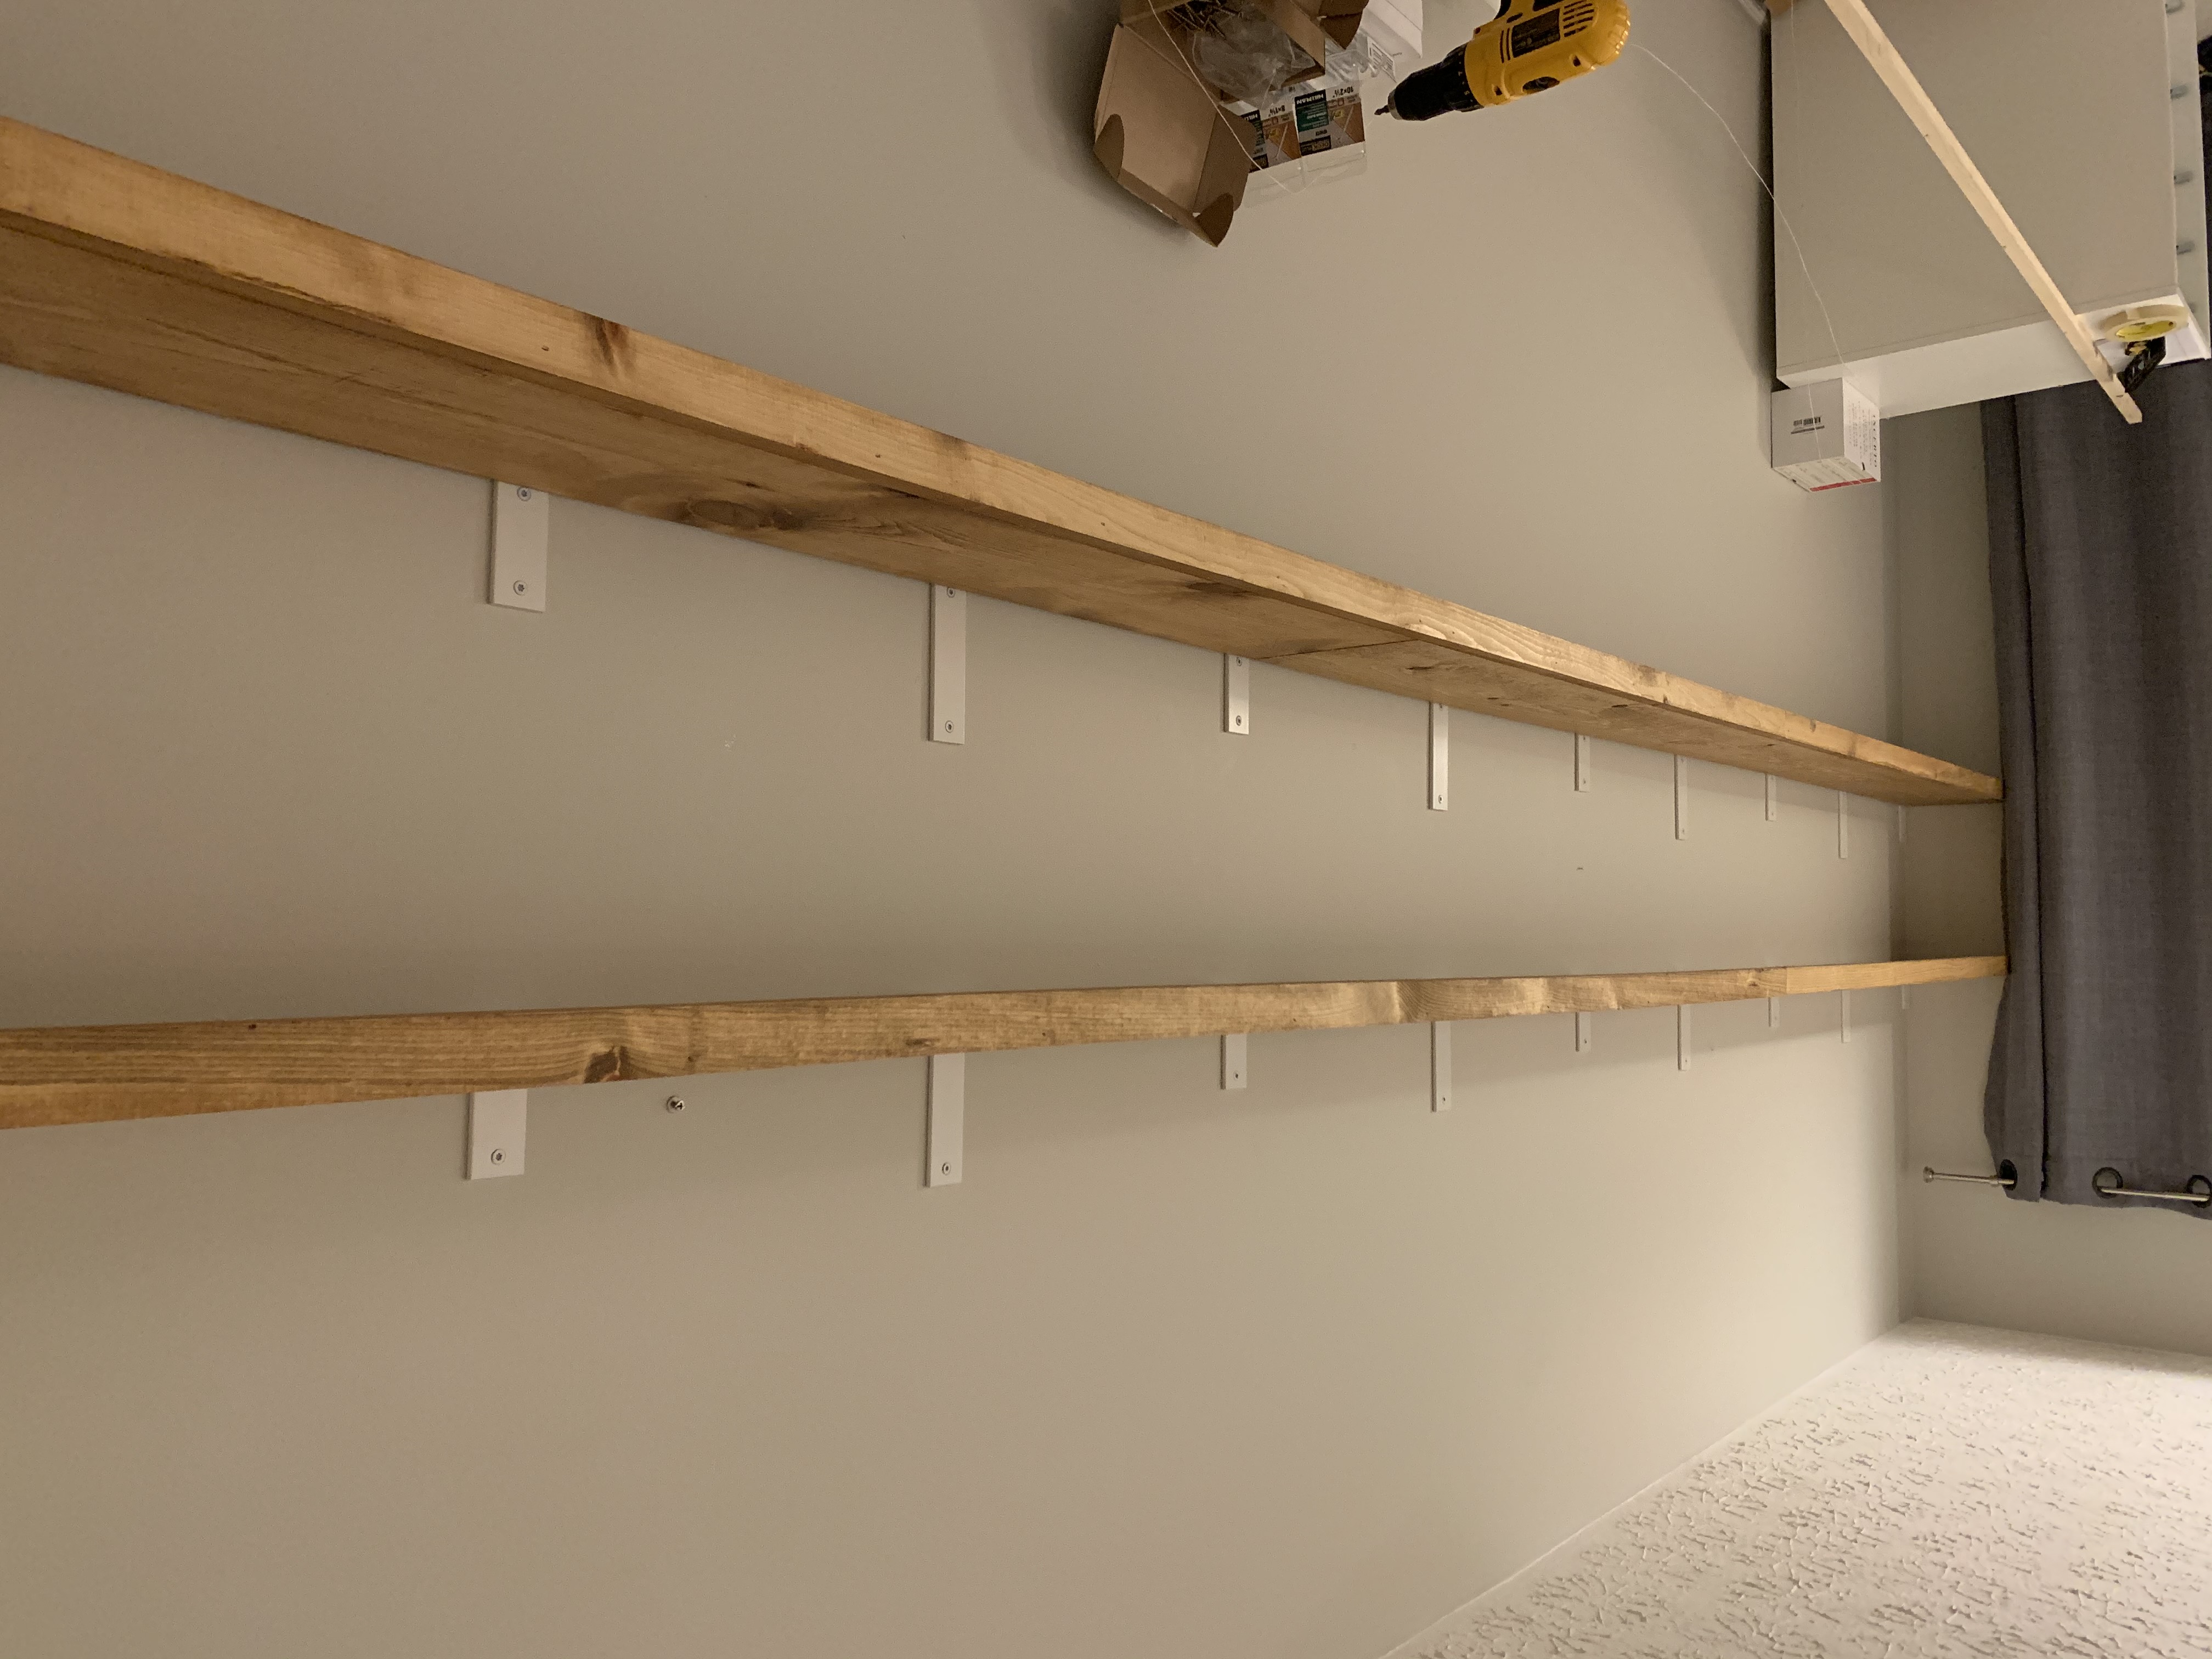
The shelves span the full 12' wall and are faced with a 1.5" strip to add some rigidity and hide the brackets and under-shelf lighting.
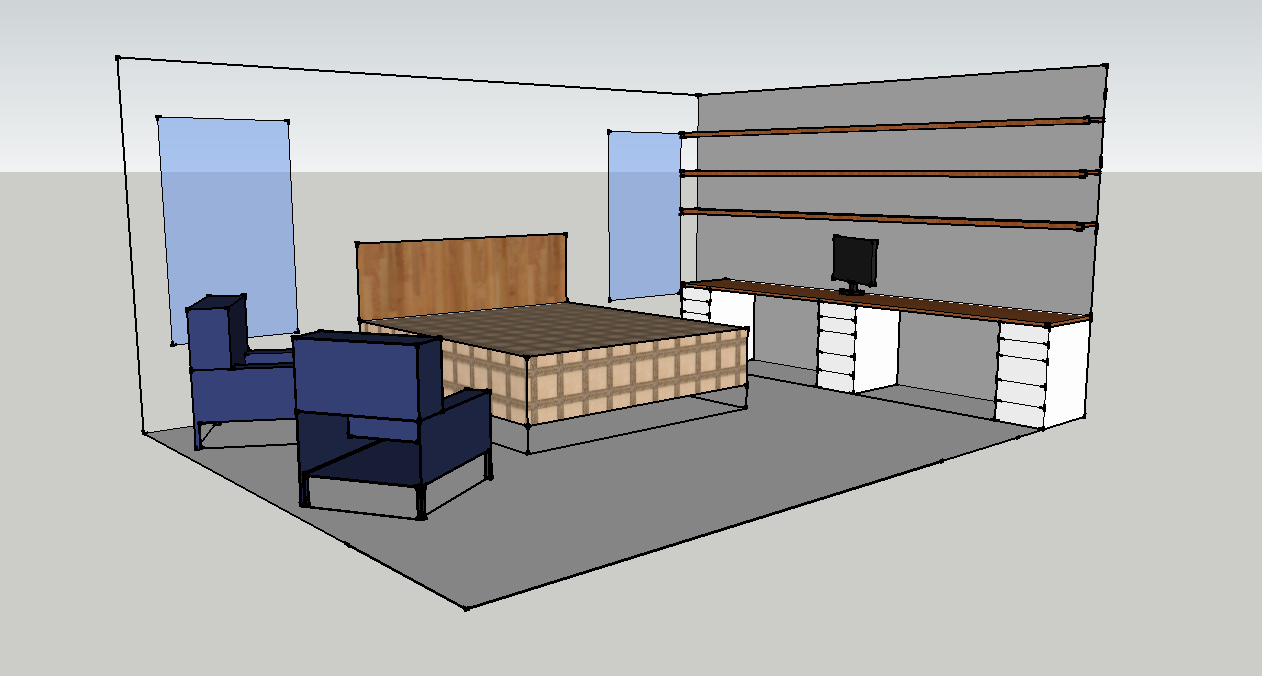
I used SketchUp to visualize the desk and shelves in the room and ensure adequate clearance. We put up two shelves to start, but I designed the spacing so that we can add a third i̶f̶ when we need more space.
Build
Materials Required
| Item | QTY | Cost | Description |
|---|---|---|---|
| Panel 3/4x24x72 | 2 | $75 | Desk tops |
| Pine 1x8x96 | 5 | $60 | Shelves |
| IKEA Alex Drawer Unit | 3 | $240 | Desk drawers |
| Shelf Brackets | 20 | $85 | 6"x4"x5mm steel |
| LED Light Strip | 1 | $16 | 3000K-6000K Tunable, Dimmable |
| Wireless Charger | 1 | $13 | Routed into desktop |
| Miniwax Stain (Golden Oak) | 1 | $8 | 1 coat |
| Miniwax Wipe-On Poly | 1 | $12 | 2-4 coats |
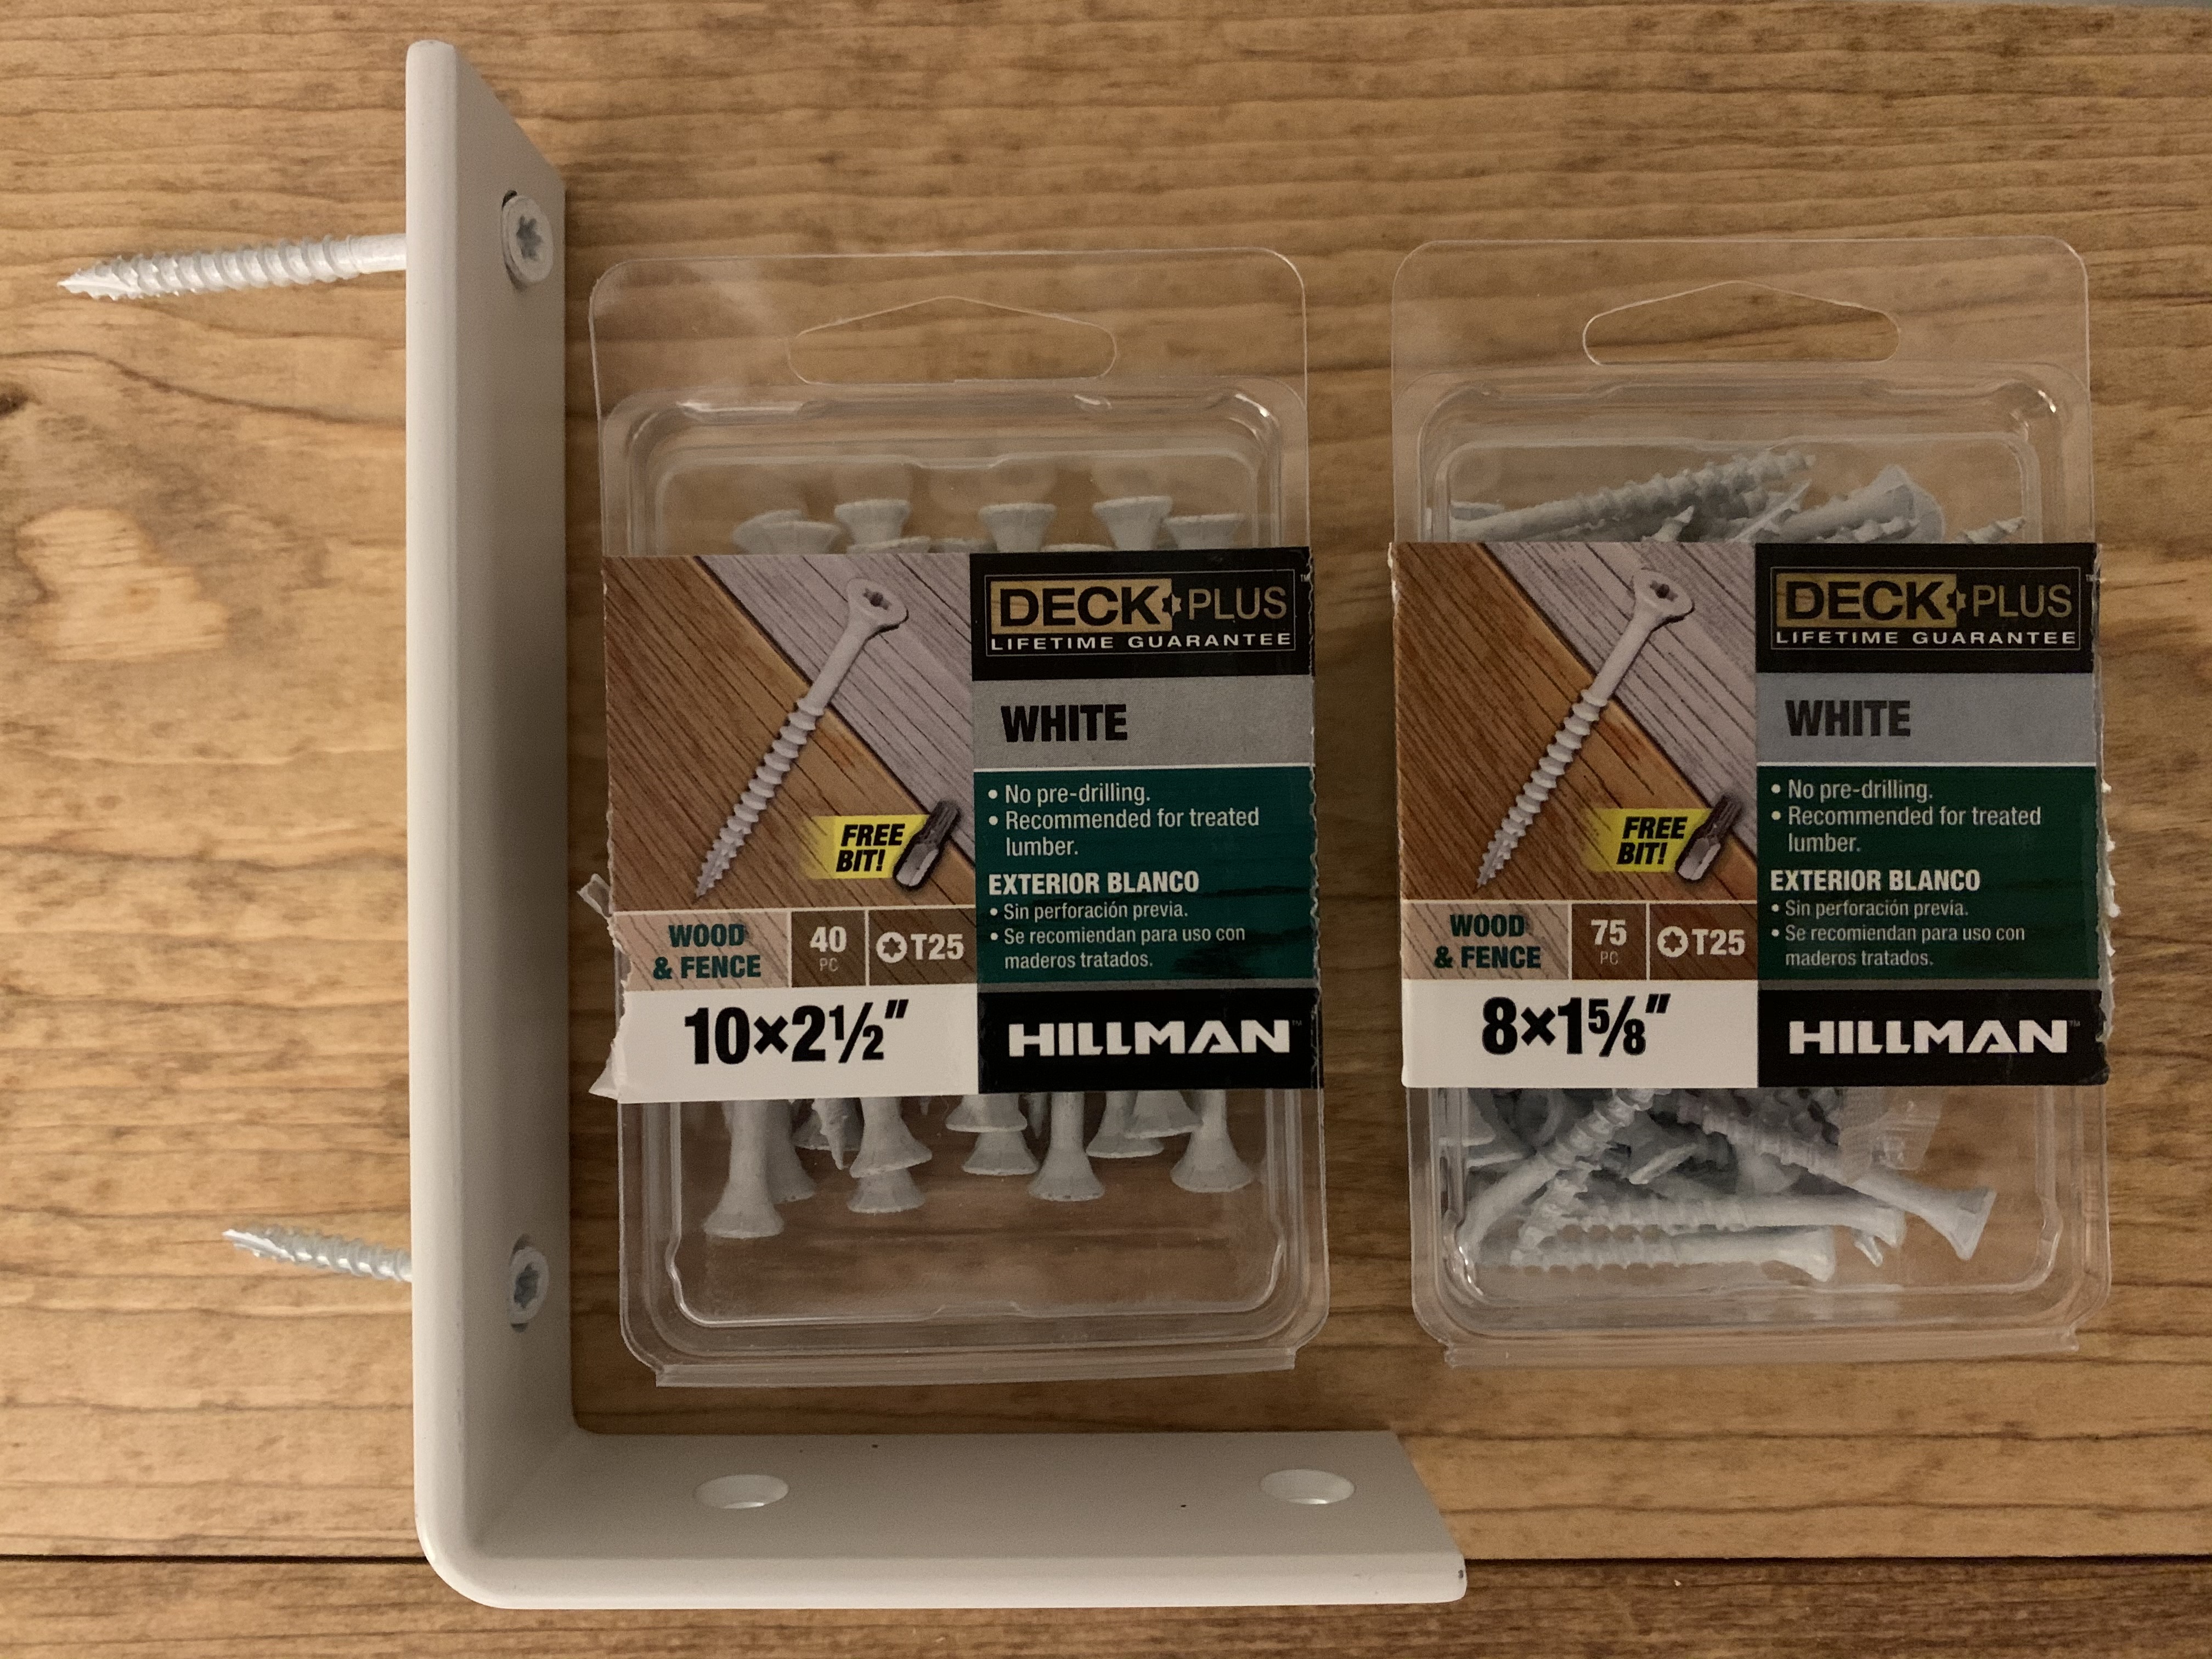
| Screws | 2 boxes | $12 | 20x 2½" (top) and 20x 1⅝" (bottom) |
| Total | ~$500 |
Tools Used
- Tape measure
- Speed Square
- Circular saw
- Miter saw
- Assorted clamps
- Hand plane
- Router
- Random orbit sander
- Electric drill
- Brad nailer
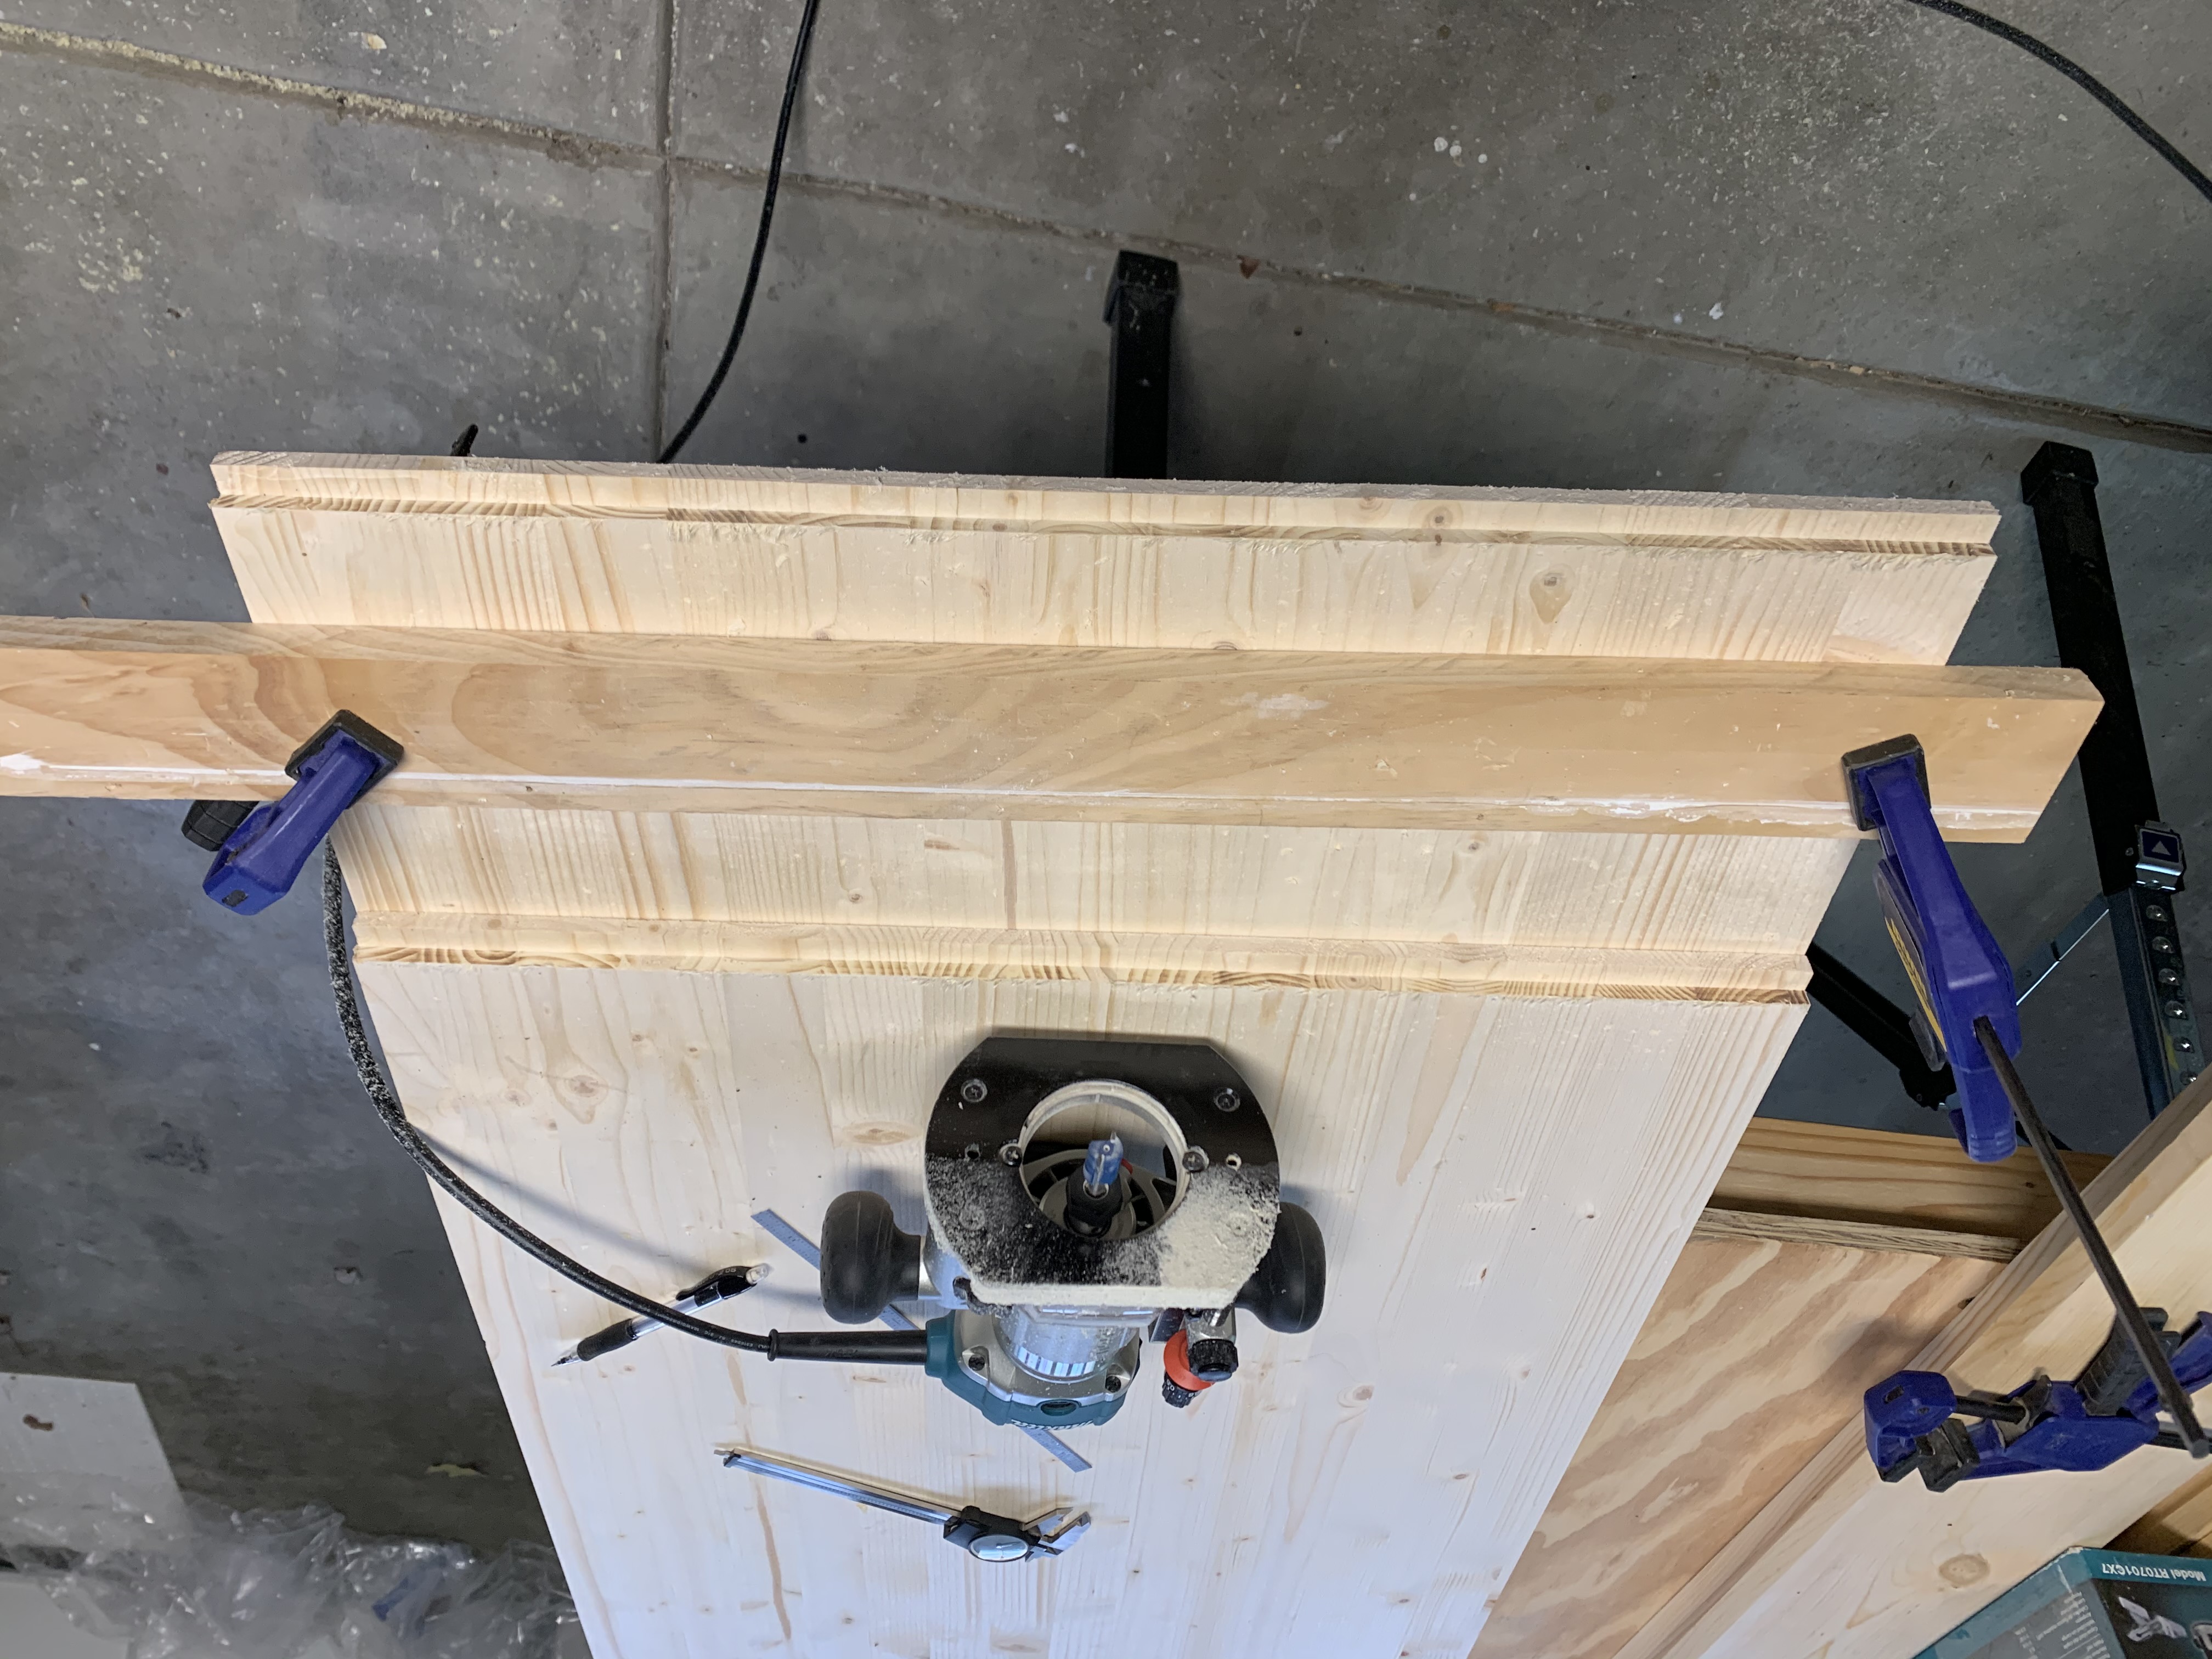
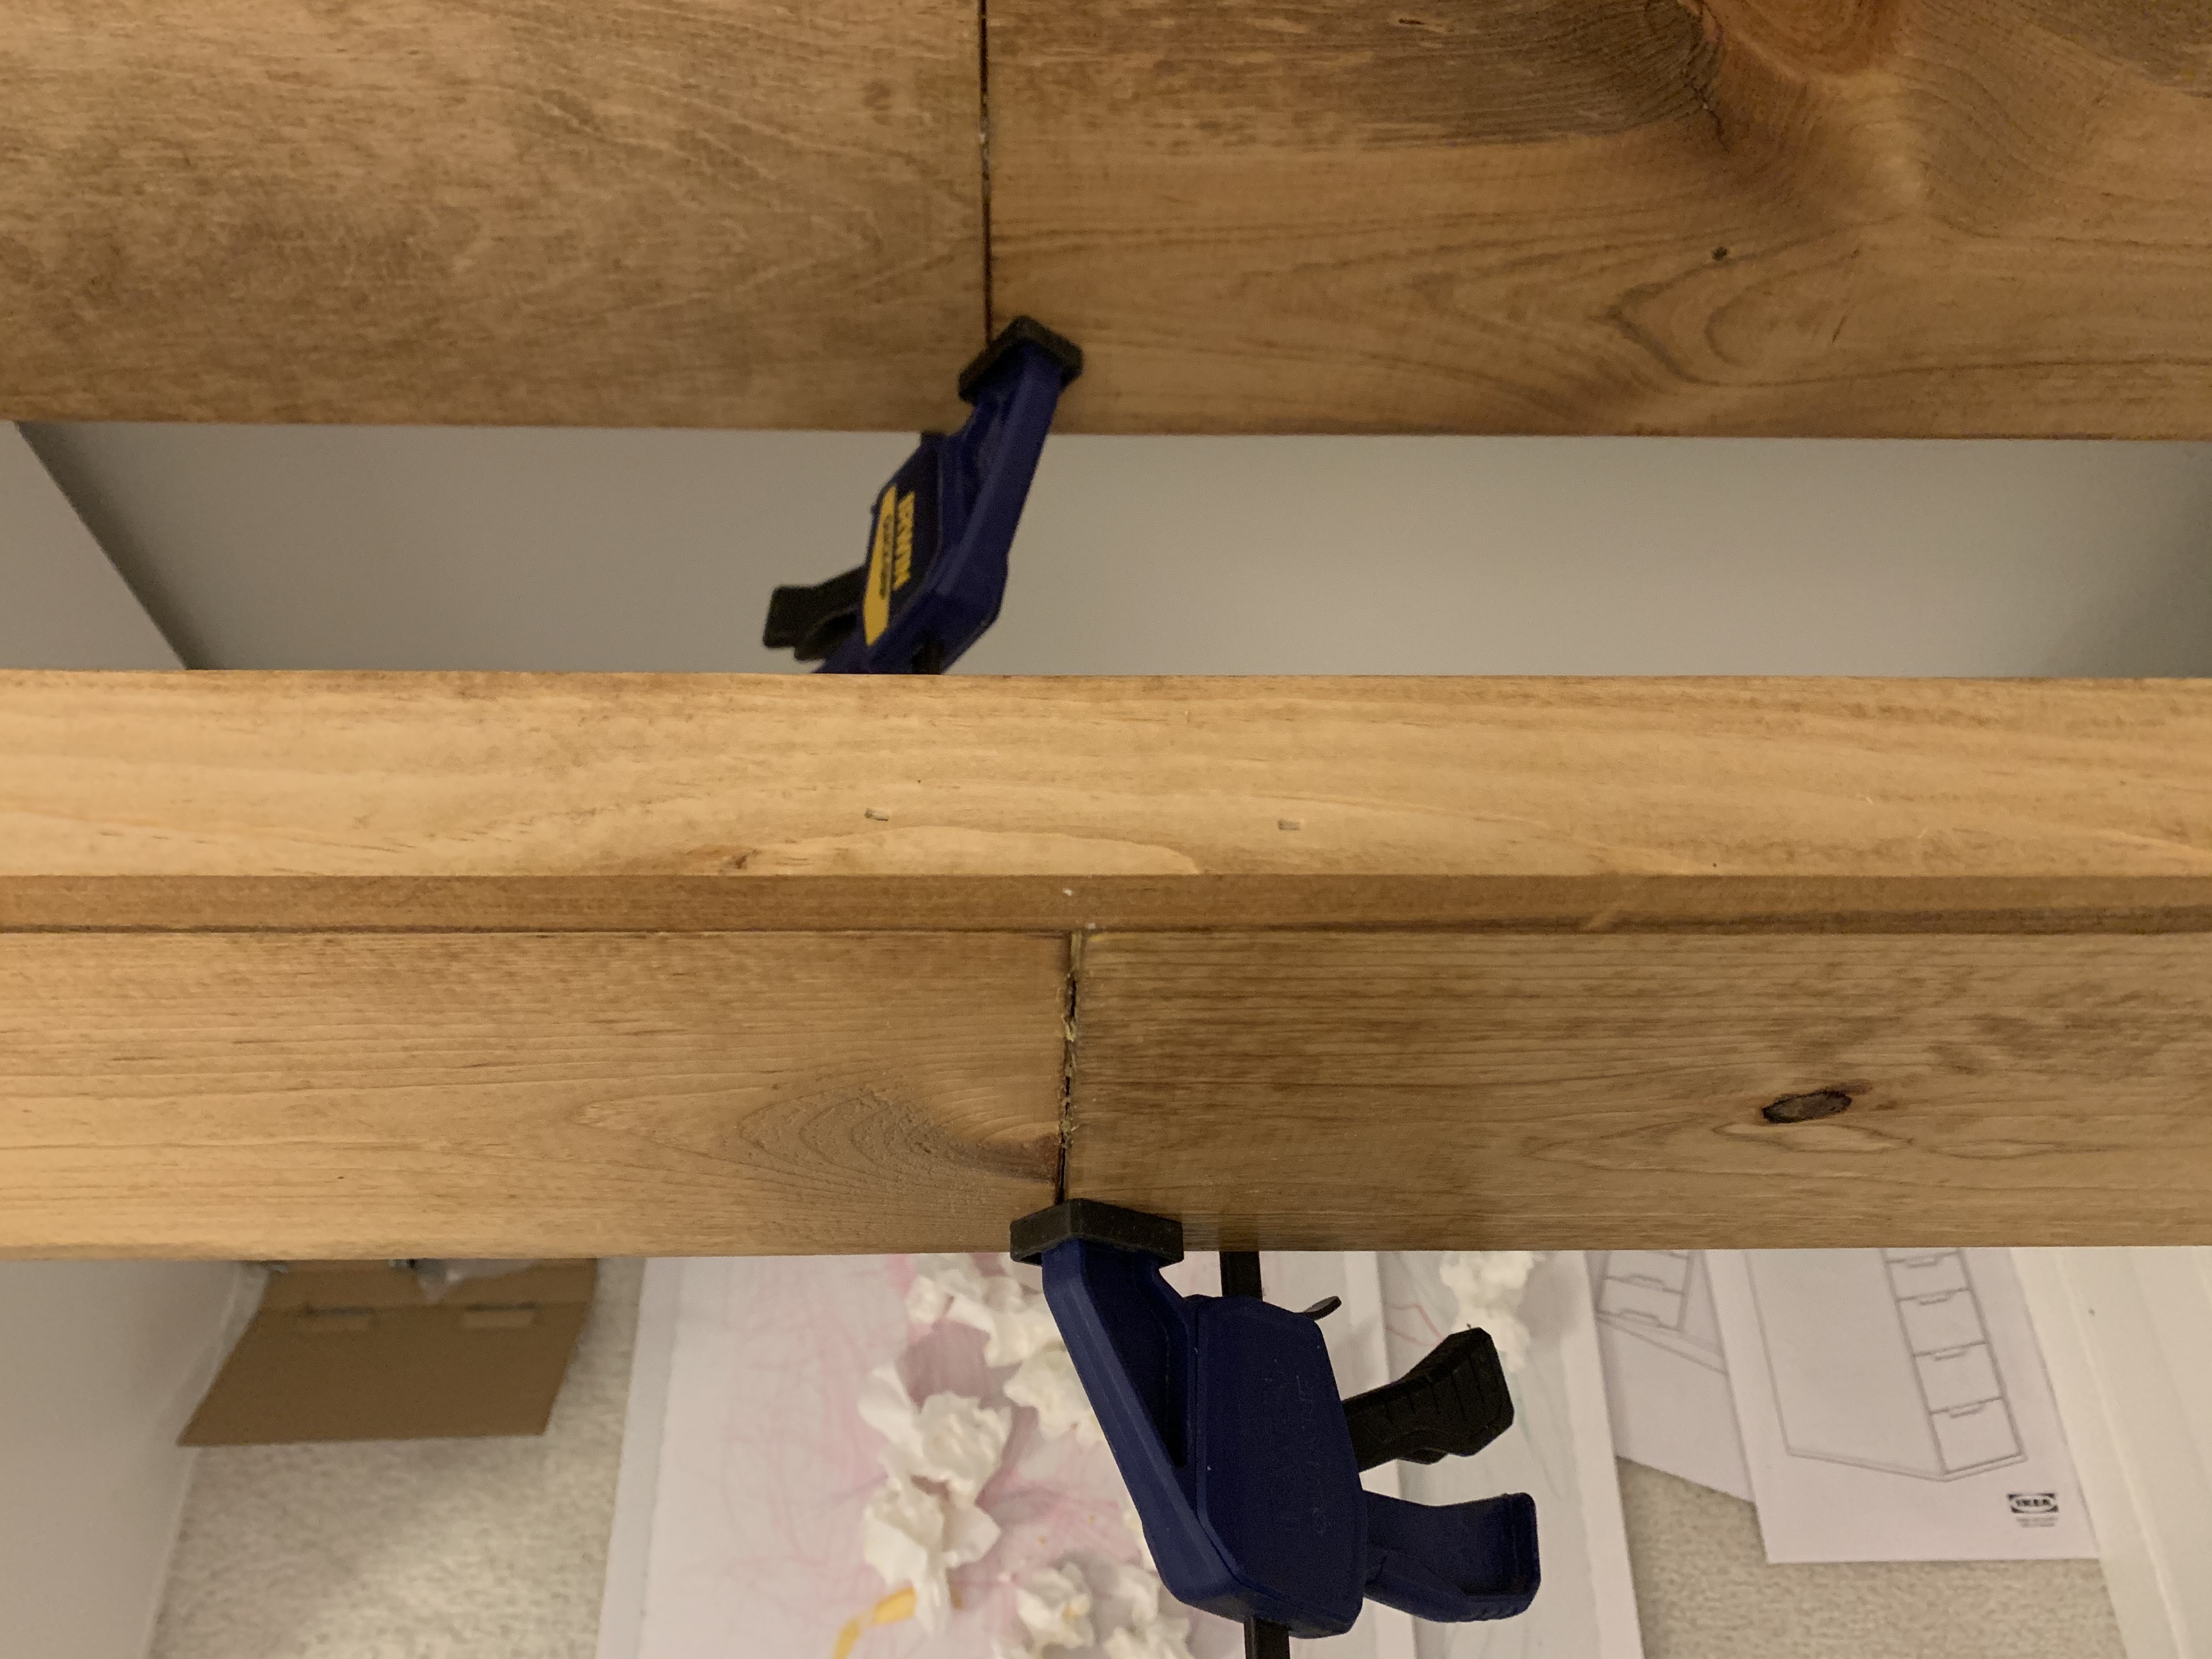
First I used the router to rabbet the ends of each shelf and desk panel and cut them to length with the circular saw.
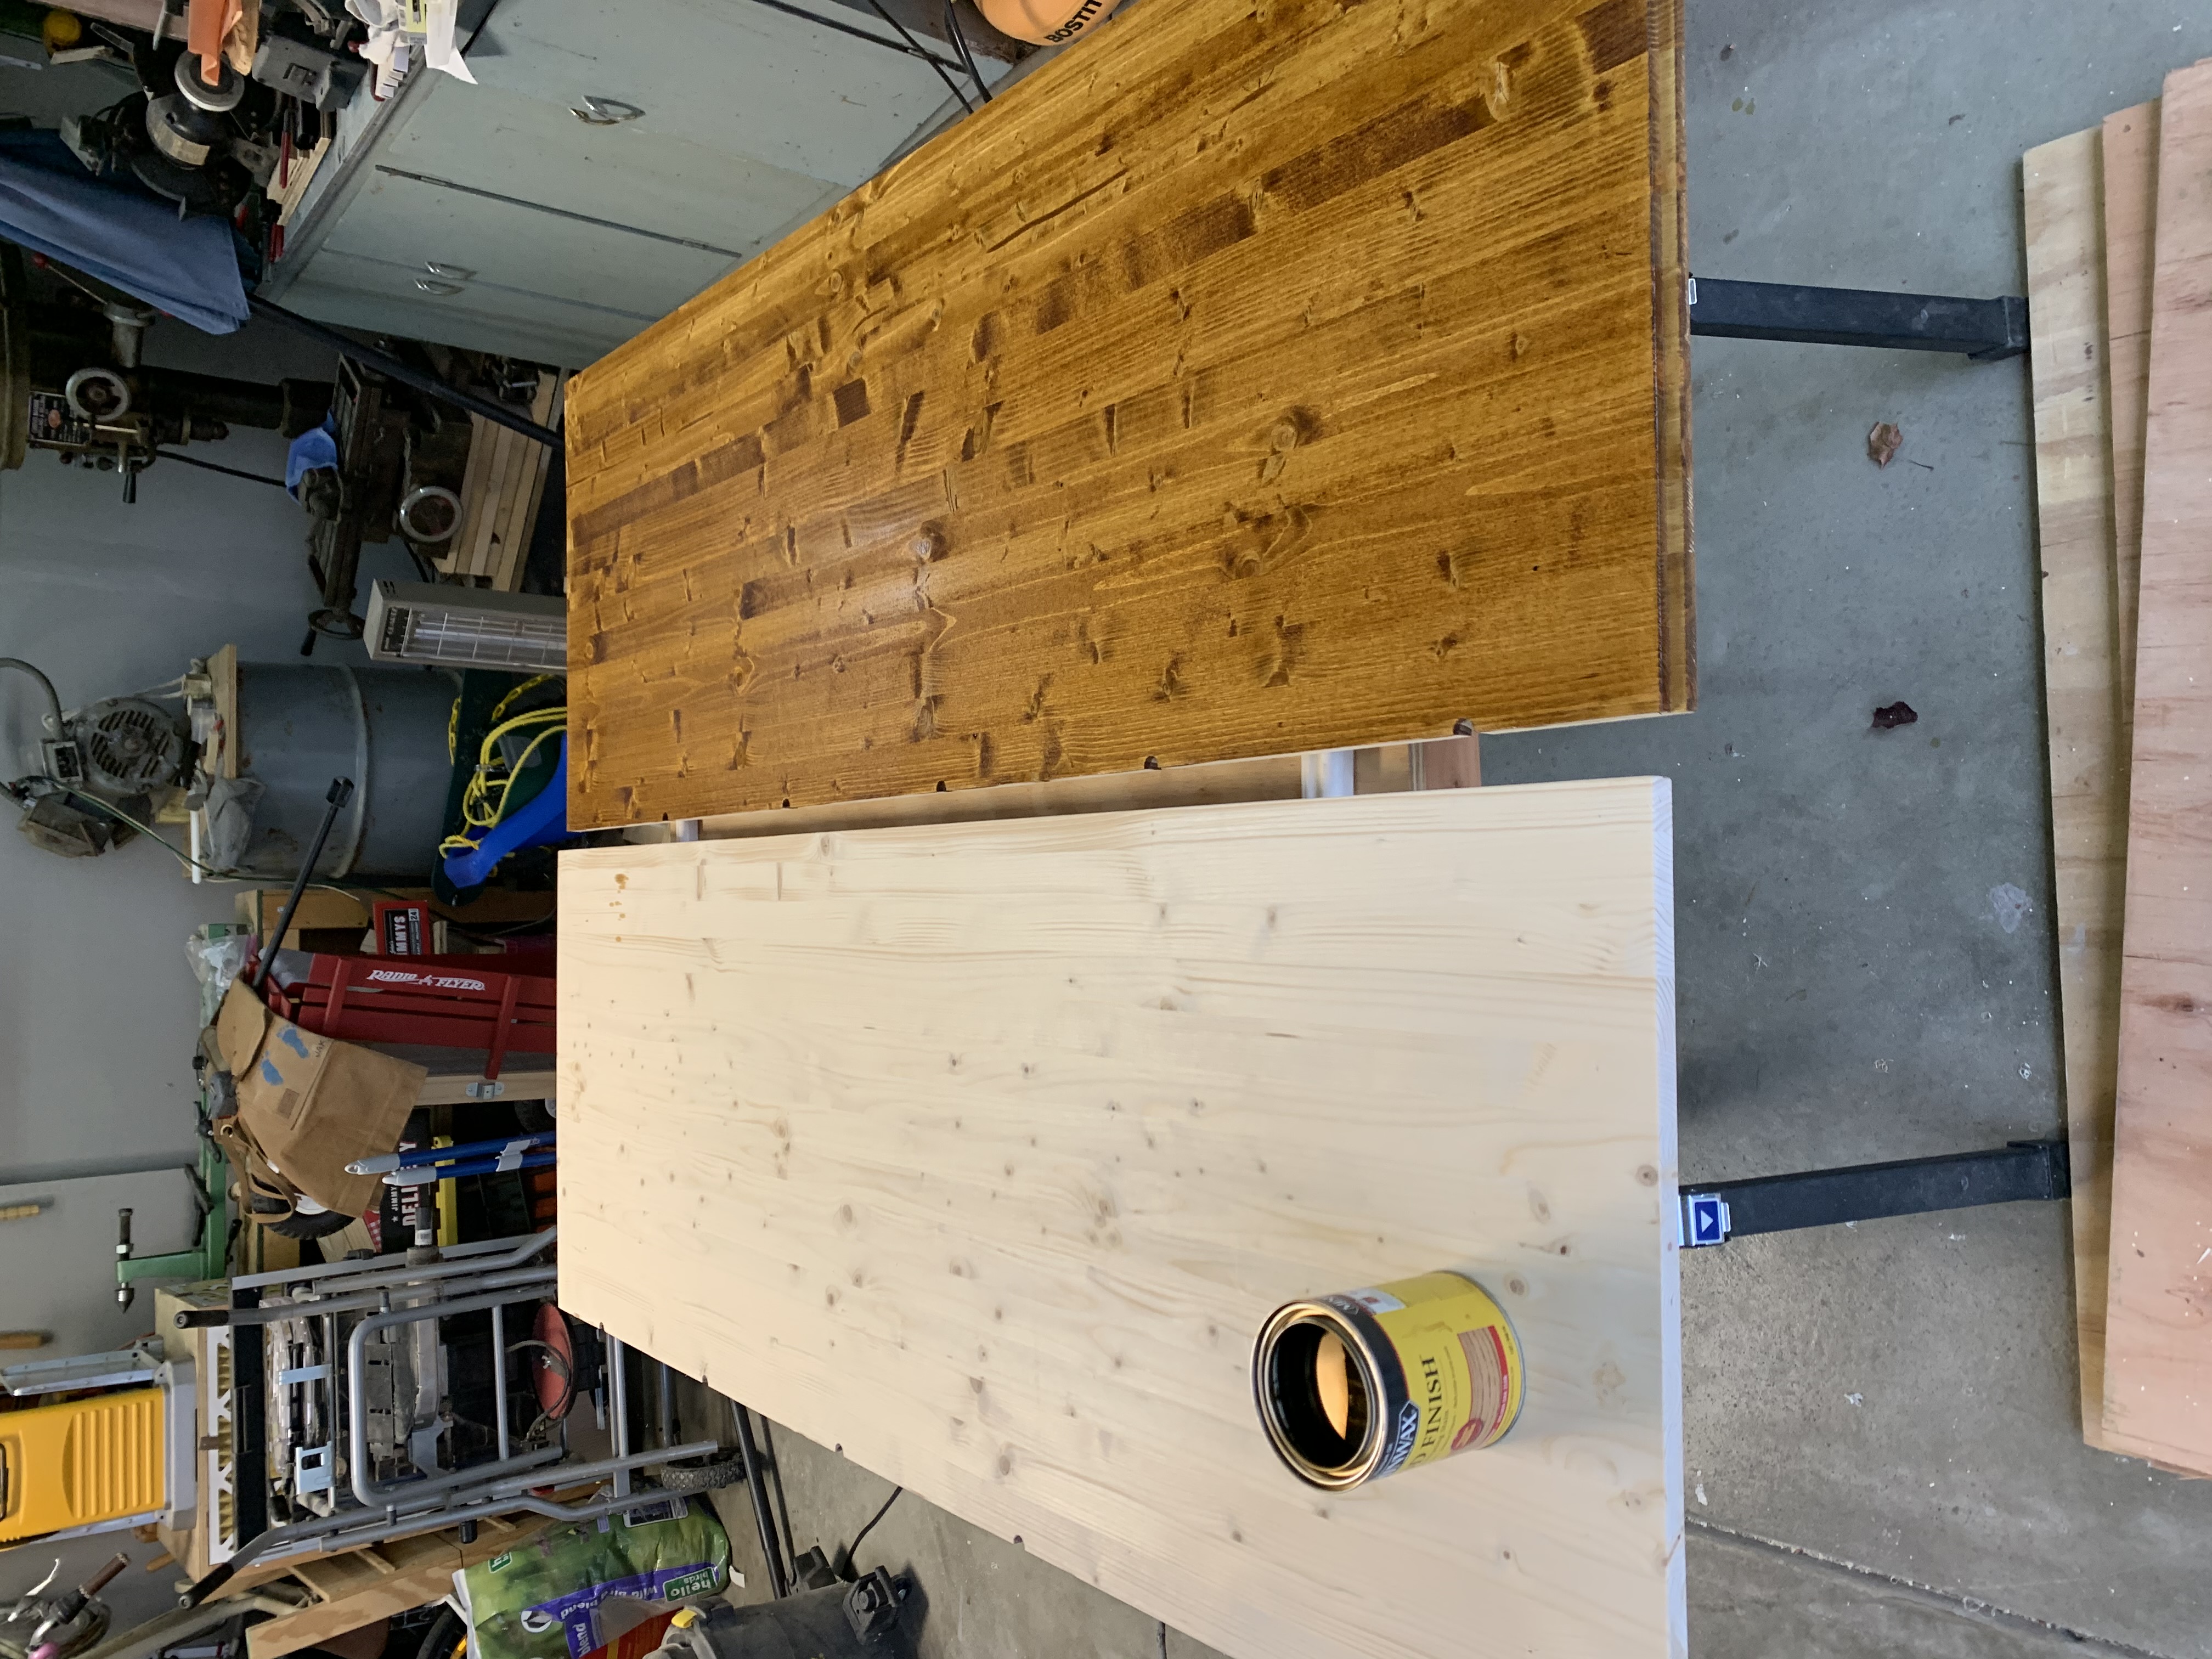
The most time consuming part of this project was finishing, especially with colder temperatures. I stained with Golden Oak Miniwax and was pleasantly surprised with how nice the desk panels looked when finished. I followed this up with a few coats of wipe-on poly.
I glued up the rabbeted shelf joints and used a brad nailer to tack on the edging while the glue dried.
I used 6" by 4" steel brackets to mount the shelves to the wall, one bracket in each stud along the 12' span for a total of 10 brackets per shelf. The brackets are very sturdy and this is overkill for how the shelves are currently loaded, but I want to be able to stack wall-to-wall books with no issue and these make for a very robust attachment. I taped a string on the wall to align the brackets and ensured they were level as I went.

The top screw carries most of the load in this application so I opted for 2½" on top and smaller 1⅝" screws on the bottom.
I would have preferred that the brackets were 6" by 6" (rather than 4") so that they extended farther past the centerline of the 8¾" shelves. The simple solution was to alternate the orientation of the brackets so that half of them have the long end under the shelves.
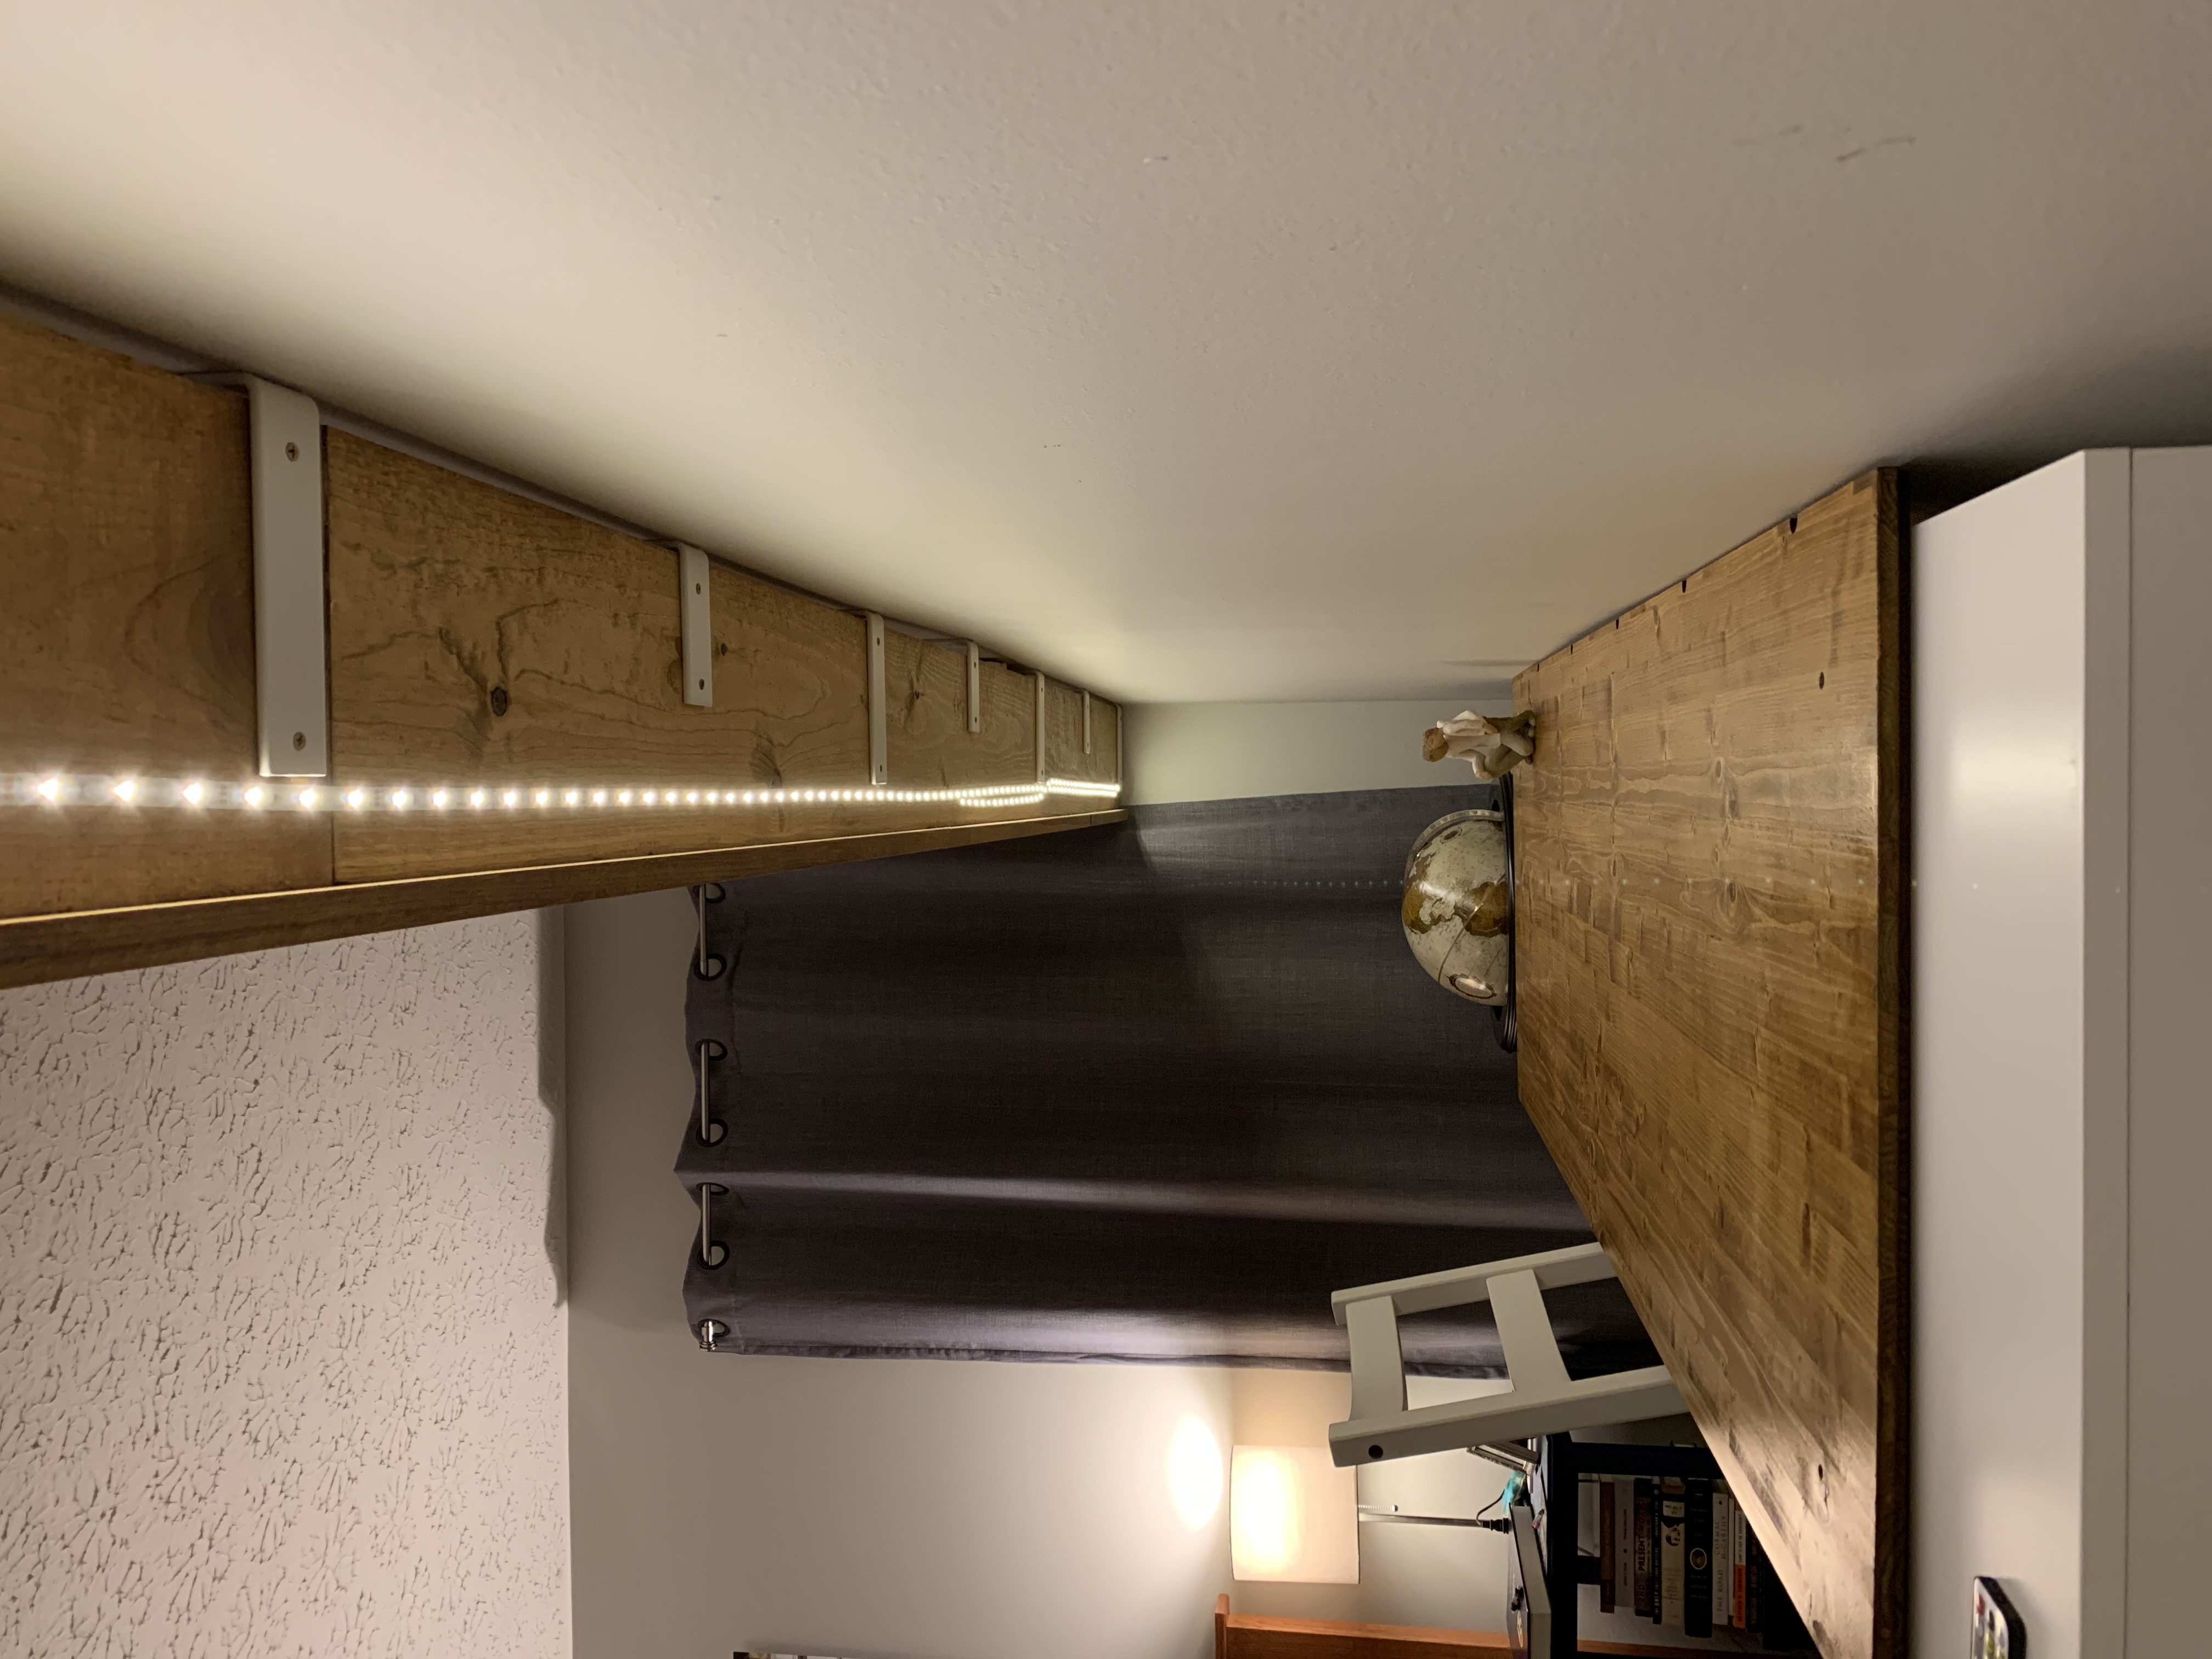
After the shelves were mounted I installed an LED light strip under the bottom shelf to illuminate the desks. I have had a lot of success with this style of lighting in this type of application since it is low cost, easy to install, low power, and provides great lighting. This one is even dimmable and has adjustable color temperature via a remote.
With the cabinets assembled, I installed the desk tops and am very please with the finished product.