Back to Woodworking Projects
Build Log: Learning to Cut Dovetails by Hand
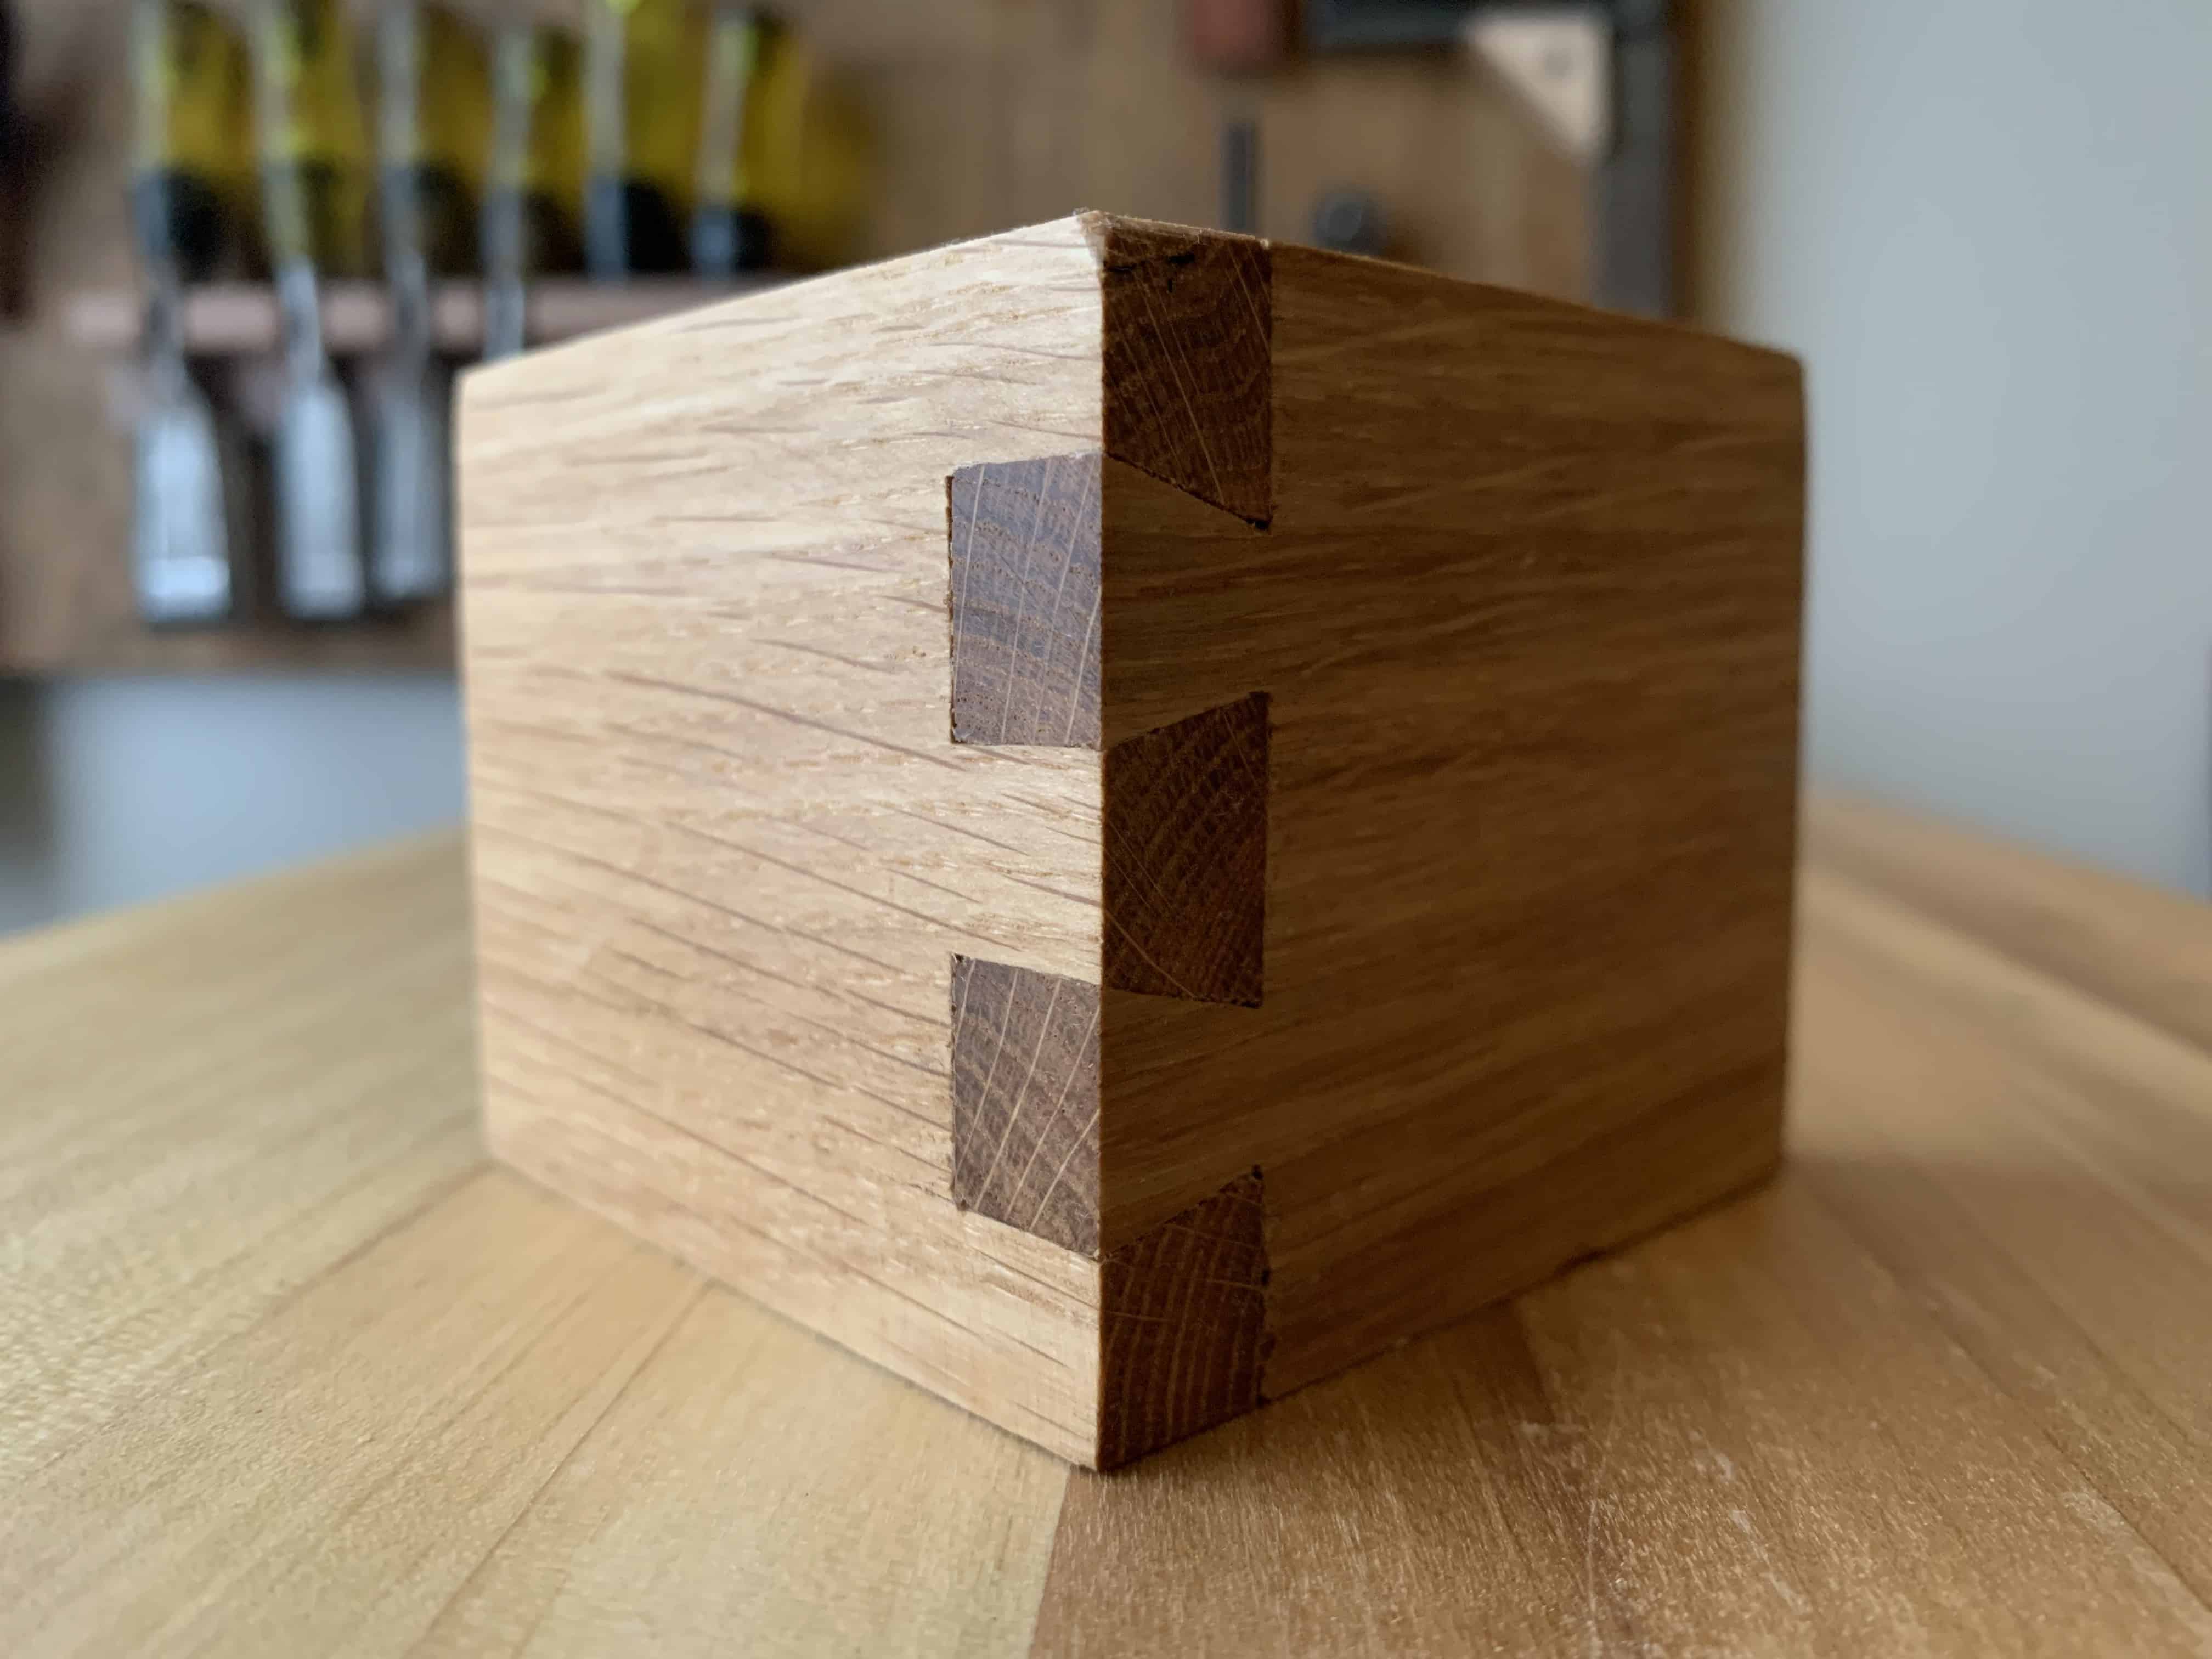
Over the past few months I have been learning to cut dovetail joints by hand. With the right tools it's not as hard as it looks. Dovetails are classic and make for a surprisingly simple and sturdy joint. And they look great!
Learning to cut dovetails is a rite of passage of sorts for woodworkers. There are plenty of resources out there to learn this skill. Below are a few that I found useful:
- Wood & Shop: How to Cut a Dovetail Joint with Hand Tools | 8 Steps
- Rob Cosman: Dovetails in 3 1/2 Minutes with Rob Cosman
- Rob Cosman: How to Cut Dovetails by Hand – A New Approach (2020)
- Frank Klausz: 3-Minute Dovetails with Frank Klausz
- Frank Klausz: Hand Cut Dovetails with Frank Klausz
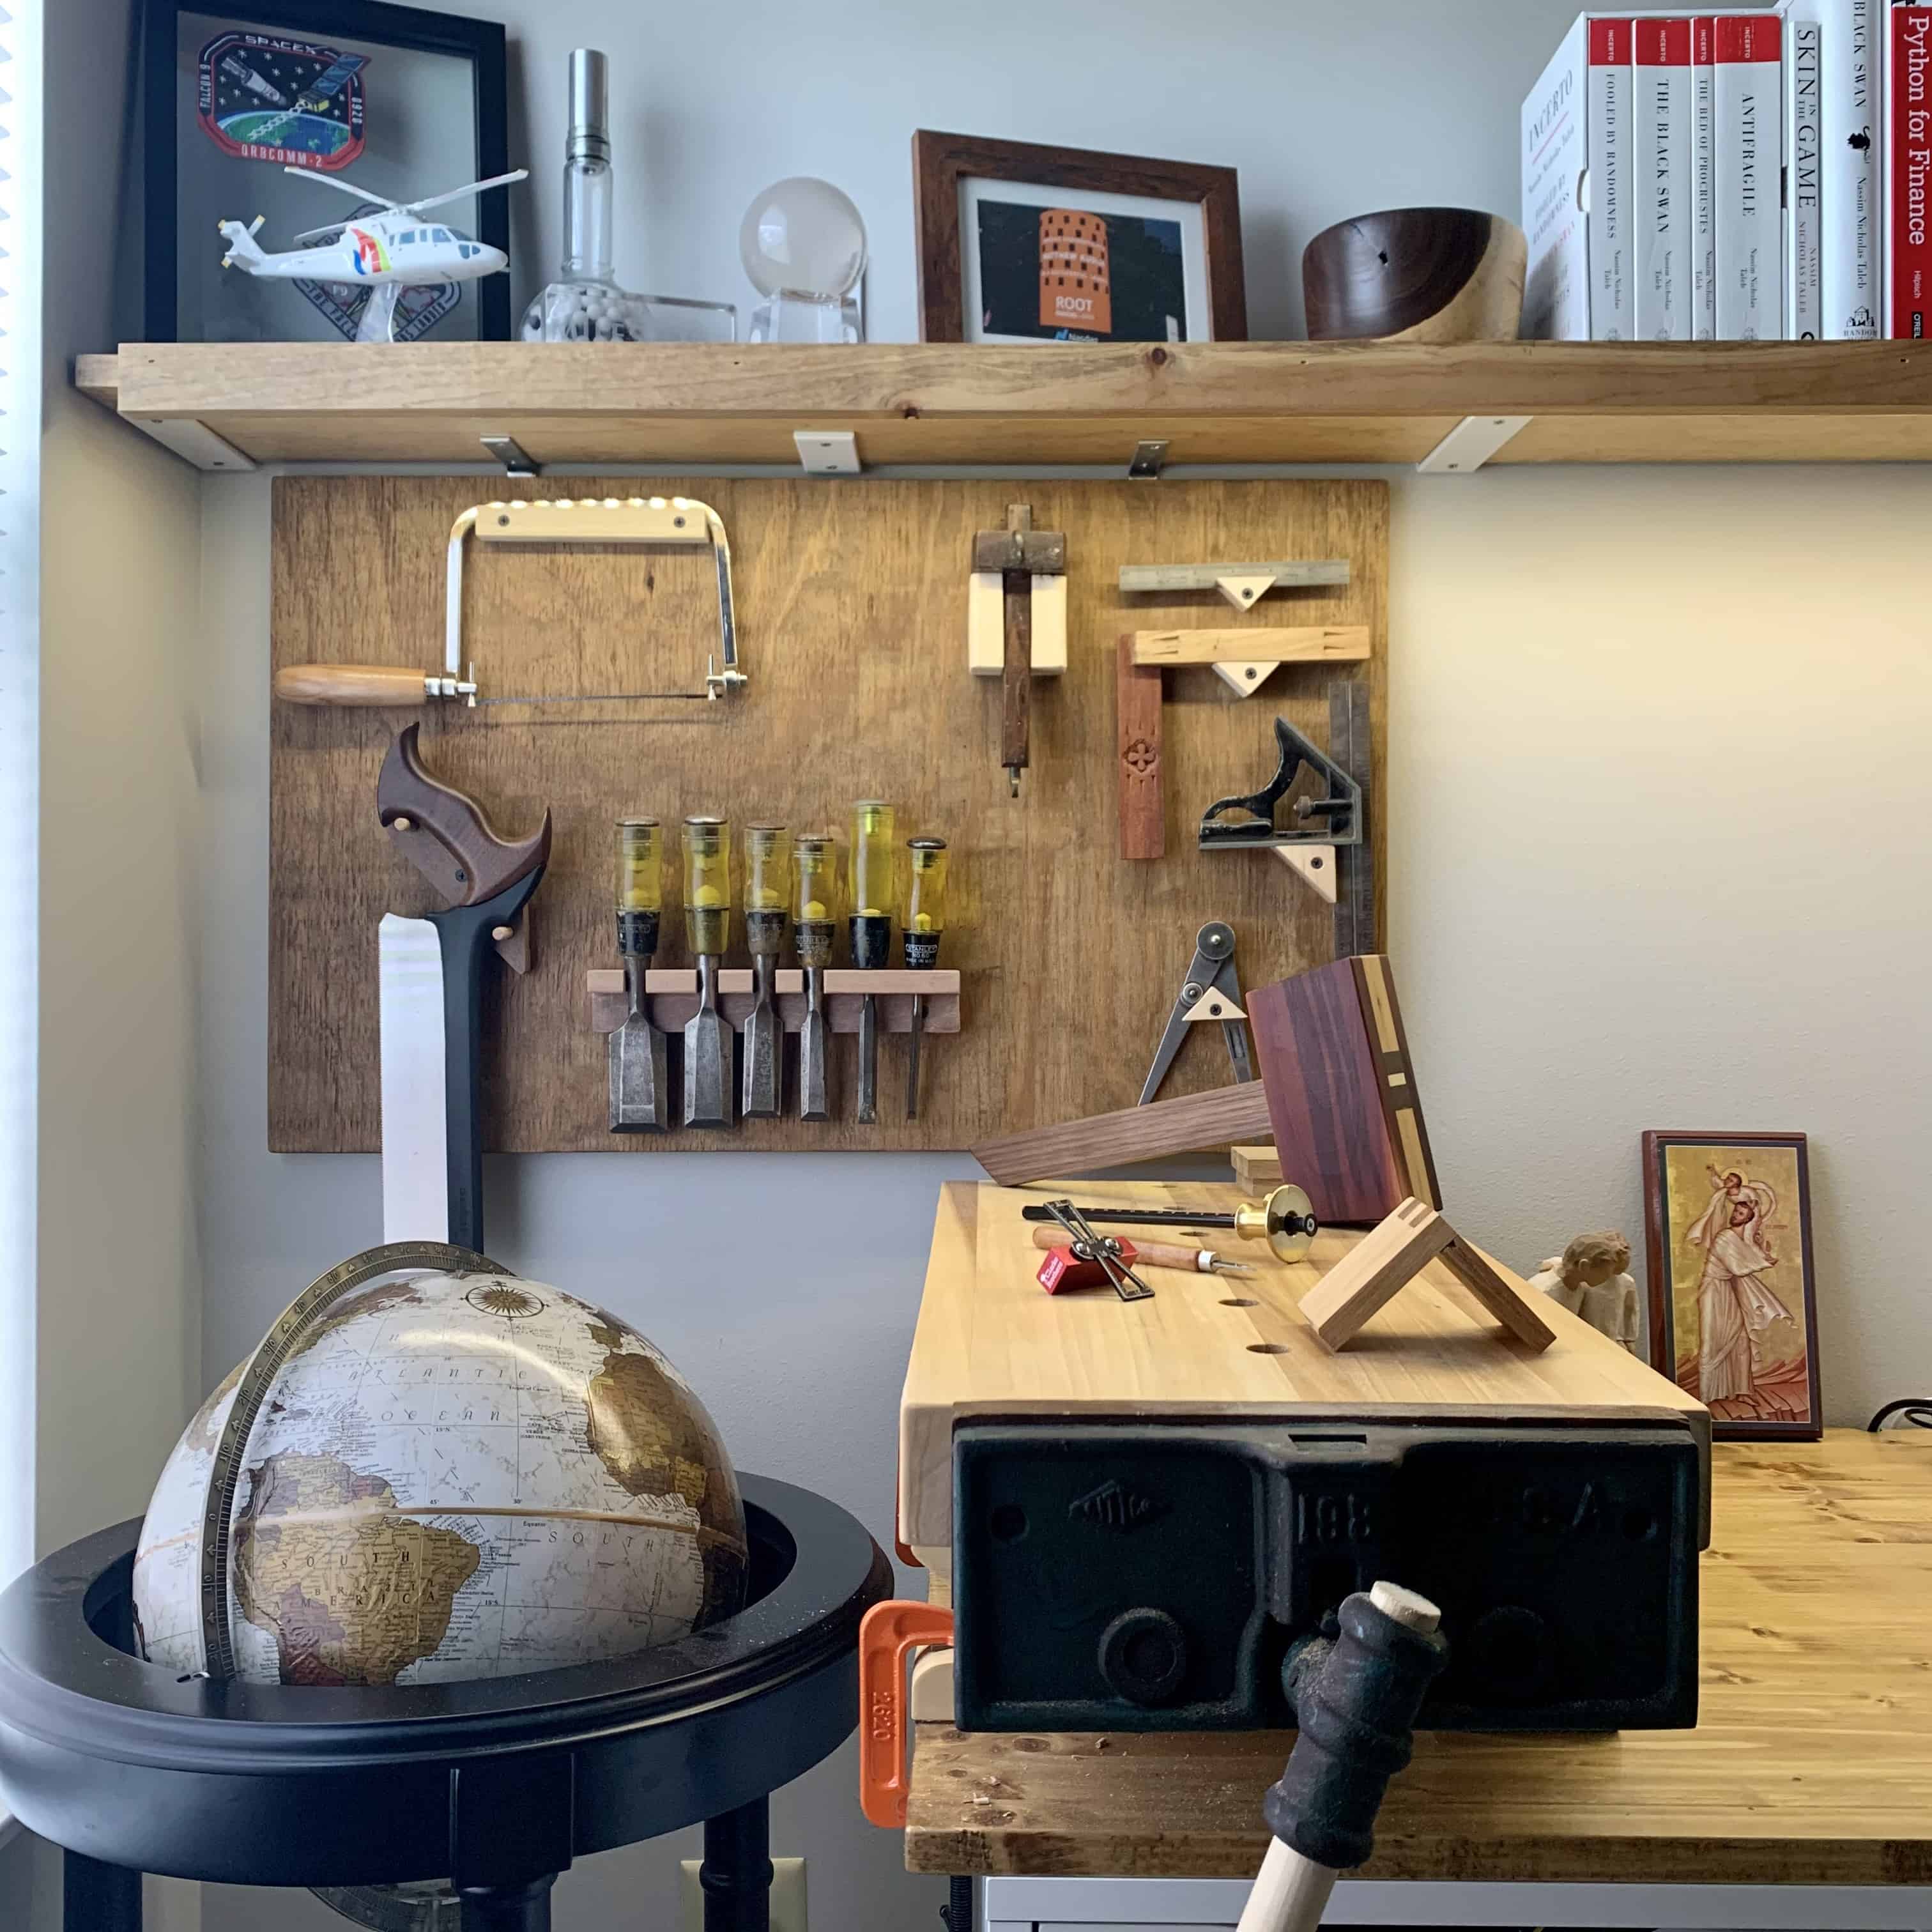
These are the tools I use to cut dovetails:
- Workbench: a mini poplar workbench attached to my desk; this vise works well for the short stock I practiced with, but a proper Moxon vise is better suited for longer pieces
- Divider (optional): for evenly spacing the tails
- Marking Gauge: for marking how deep to cut tails and pins, I have this one as well as an old Stanley marking gauge from my grandfather
- Marking Knife (with pencil): for marking tail and pin locations
- Dovetail marking tool: I use this marking tool to lay out the tails
- Square: for extending tail markings across the work piece to ensure a square cut
- Dovetail Saw: any saw that cuts will do, but the Veritas dovetail saw was highly-recommended and it has performed well for me
- Coping Saw: for removing the waste between tails and pins, this model from Lee Valley is inexpensive and works fine
- Chisels: sharp chisels (1/4" and 1/2" used most frequently) for chopping out waste and paring down to final fit
- Mallet: I use my home-made mallet for chopping out waste
This isn't a how-to guide, but here are roughly the steps I follow to cut dovetails:
- Layout: Set the marking gauge depth to the thickness of the stock and mark all edges of the pins stock, and the just the long edges of the tails stock. Use a divider to lay out the location of the tails, and the marking tool to transfer the tail angles. Extend the tail locations across the work piece with a square.
- Cut tails: Use a dovetail saw to cut the tails down to your mark, and then use a coping saw to roughly remove the waste.
- Clean tails: Use a chisel to chop or pare the rest of the waste out down to your marking line, and clean up the rough saw marks on the sides of the tails.
- Mark pins: Transfer the layout from the tail board to the pin board using a marking knife followed by a pencil.
- Cut pins: Use a dovetail saw to cut the pins down to your mark, and then use a coping saw to roughly remove the waste.
- Final fitting: Slowly pare the tails to clean them up and sneak up on a tight fit.
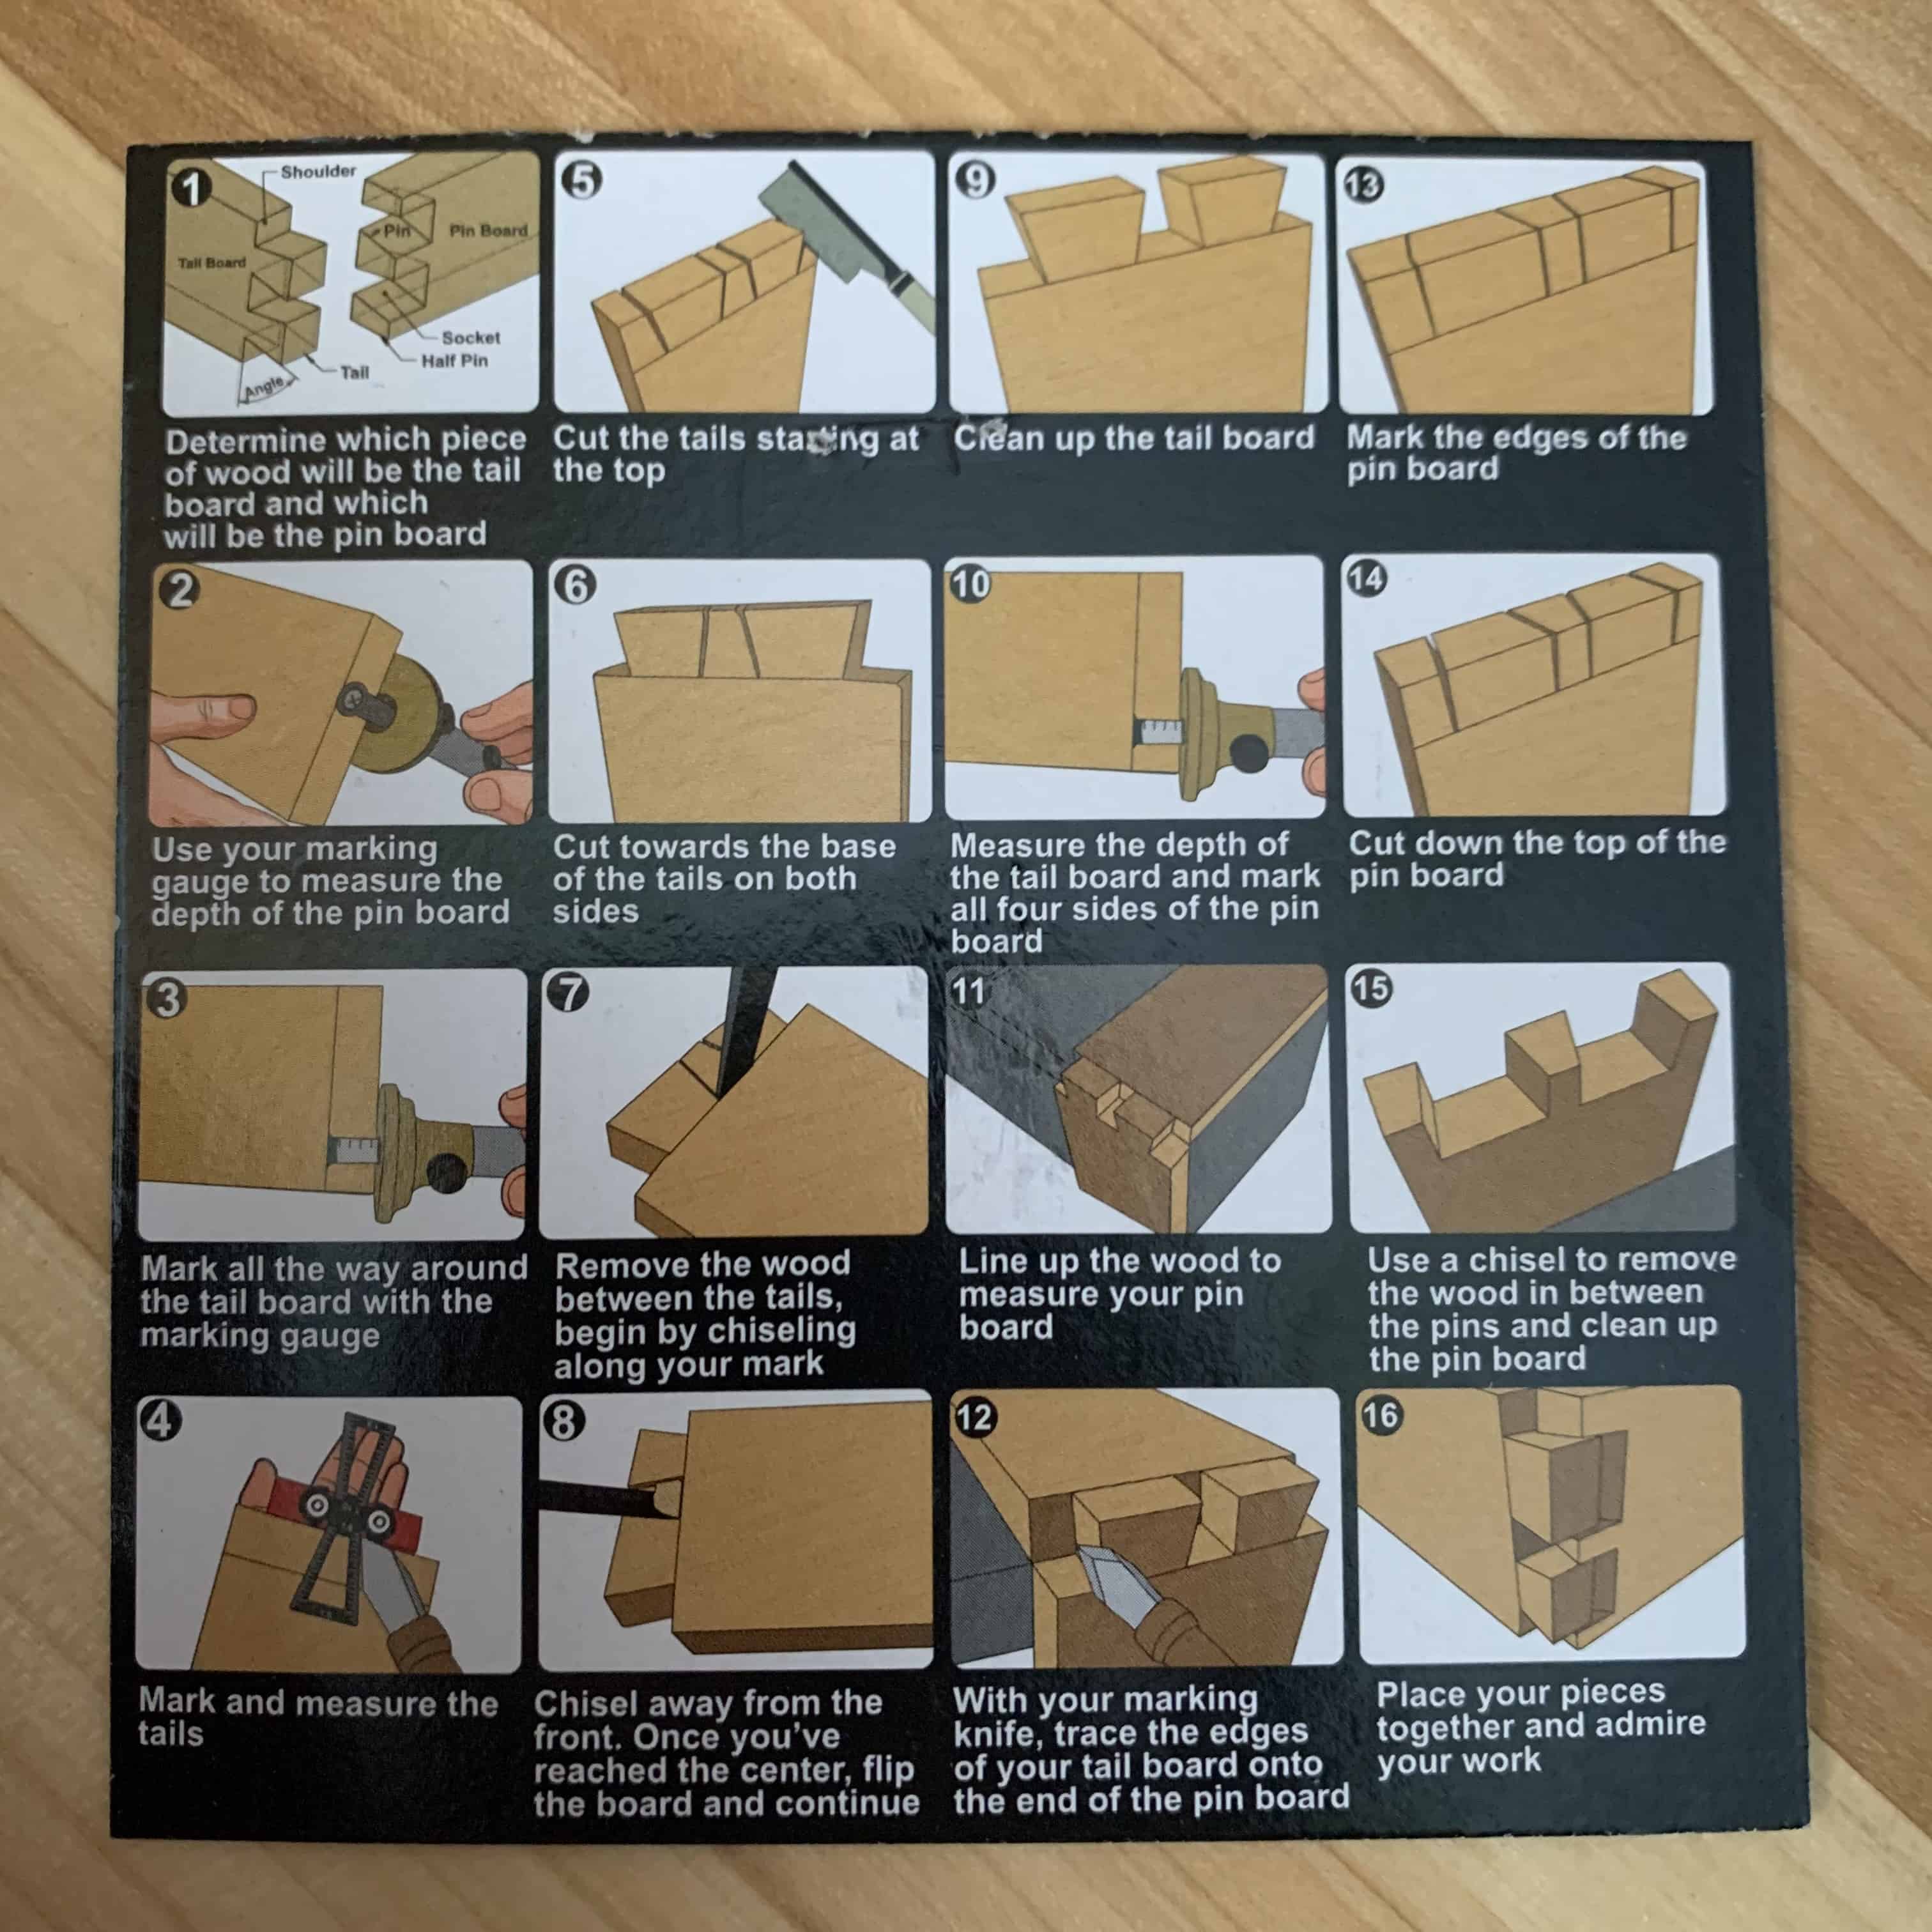
The instructions that came on the back of the packaging for my marking tool roughly align with this process and provide a nice visual.
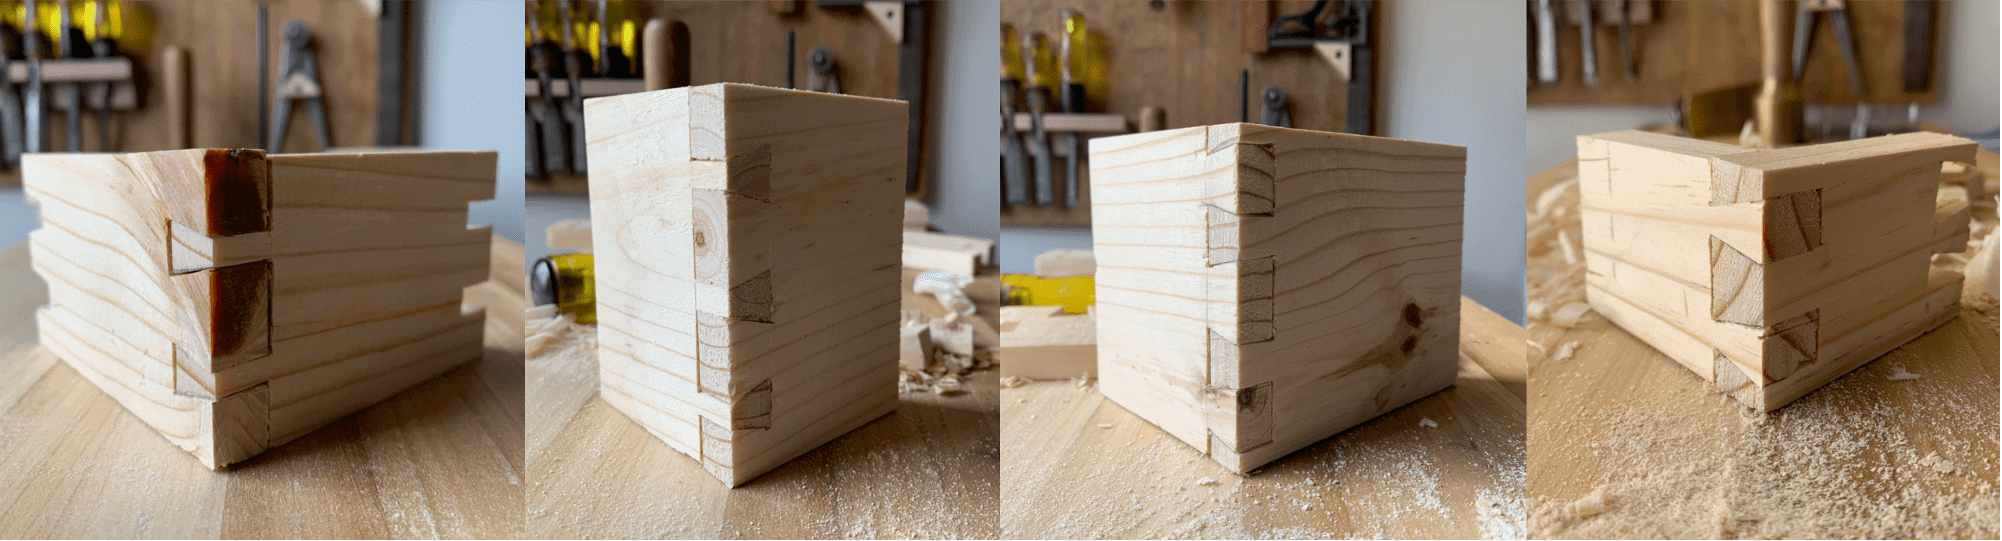
With practice and some trail and error, my results started looking better and the gaps started getting smaller. I found that it's helpful to watch a short instructional video to get the general idea and then quickly move on to get some practice. When returning to the videos I then know exactly what to look for to solve the problems I'm experiencing and refine my technique.
Even a pretty sloppy dovetail can be made to look quite nice with a bit of planing and sanding. Gluing the joint would obviously make it stronger and bring the added benefit of some more closed gaps. I'm happy with these results for a first tutorial and looking forward to including dovetails in my future projects.
My first practical application of dovetails was to fabricate some L-brackets out of scrap hardwood flooring (species unknown) to secure my work bench to the wall to prevent wobbling. Even with no glue the joints are quite strong and the fix has already made my work bench even more delightful to work at.
Created: 2021-07-06-Tue
Updated: 2022-09-01-Thu